
Add size guides to your products
Make size charts for your clothing and link them to products, so shoppers see a Size Guide next to the sizes and pick the right one.
Products · 4:28 · In Nepali
Build a size chart once, attach it to your products, and shoppers open it right next to the size picker. They order the right size, so fewer exchanges and returns cost you courier trips and staff time.
Part 1
Install the plugin
- 1
Open the Size Guide card
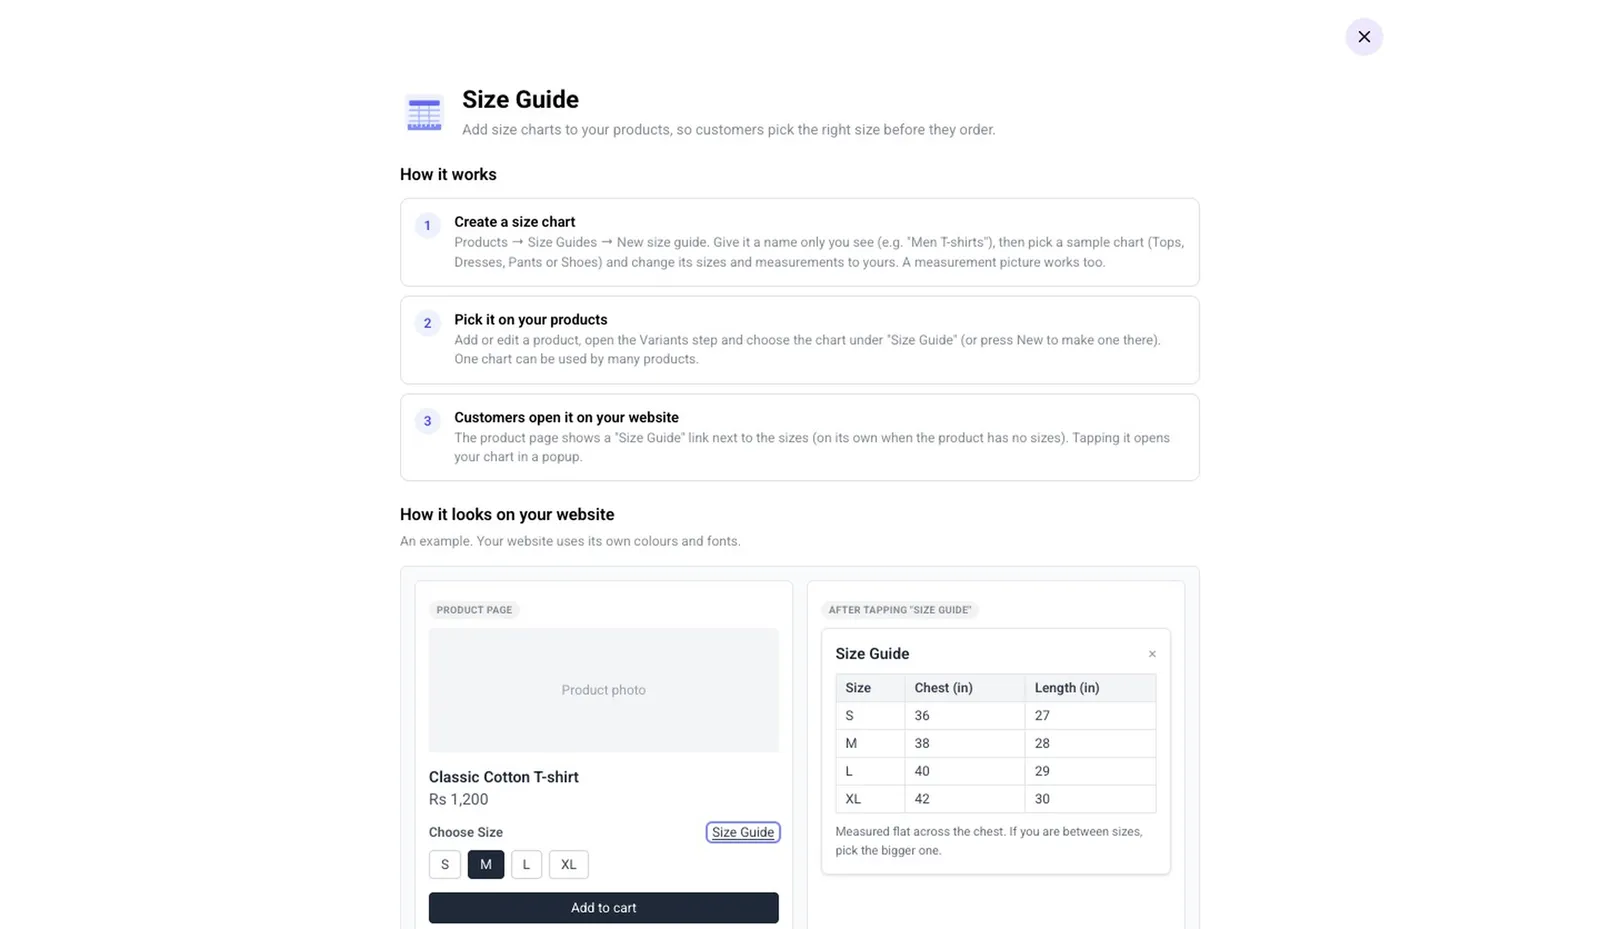
In Plugins, click Size Guide. The card shows how it works in three steps: make a chart, choose it on the product, and the customer opens it on the website.
- 2
Install it
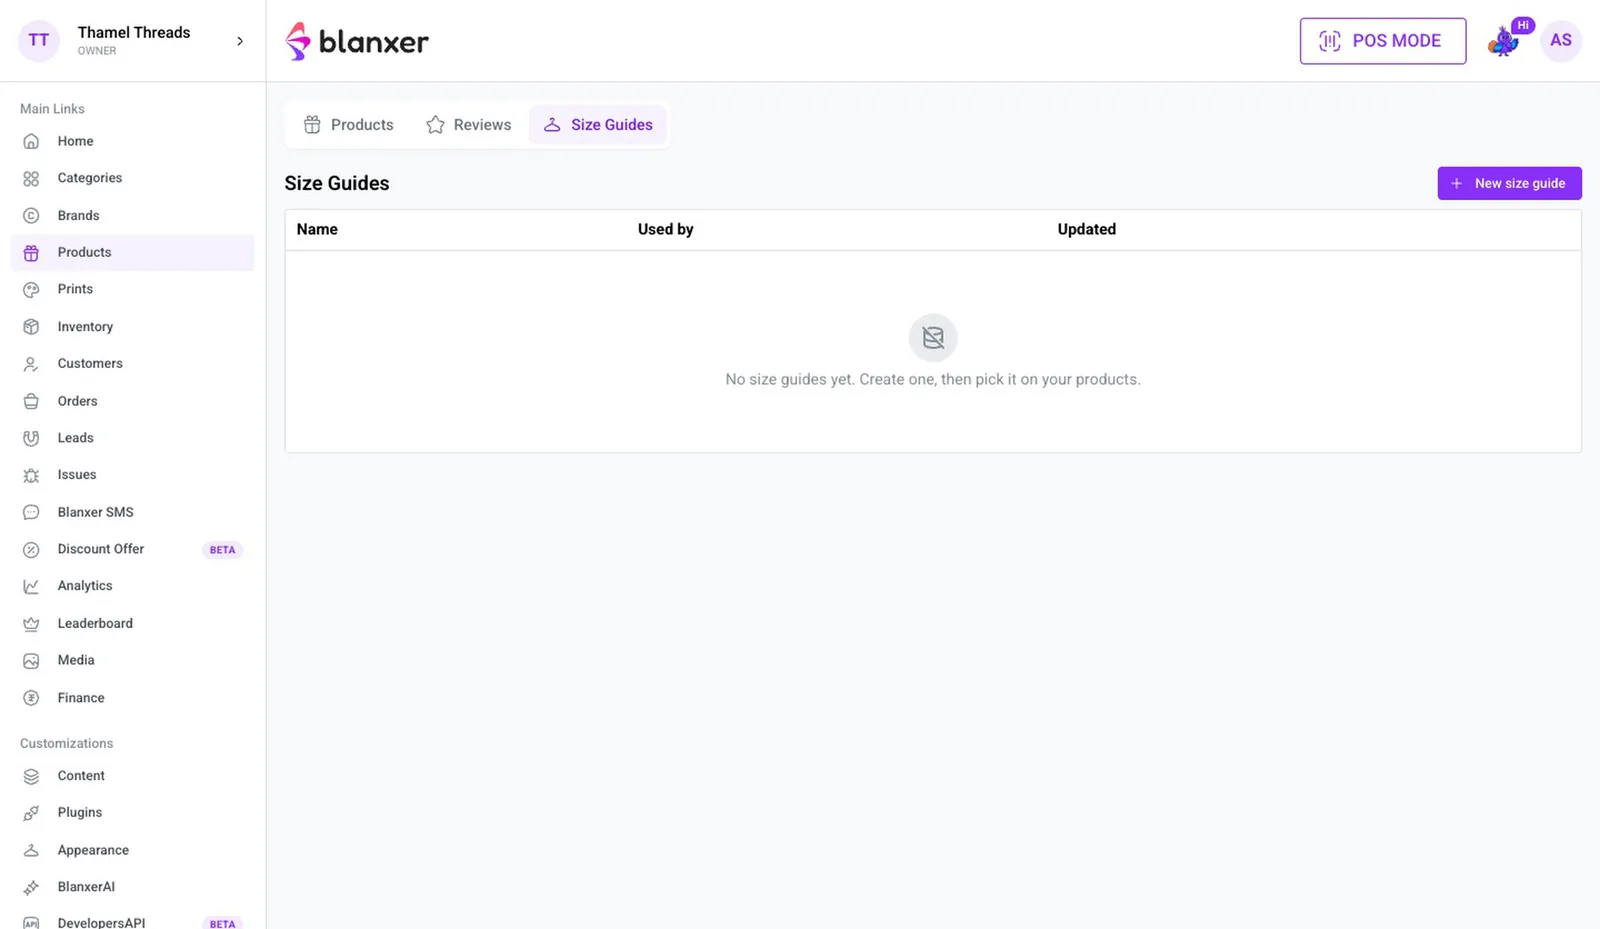
Click Install Size Guide. A new Size Guides tab appears under Products.
Part 2
Make a size chart
- 3
Start from a sample
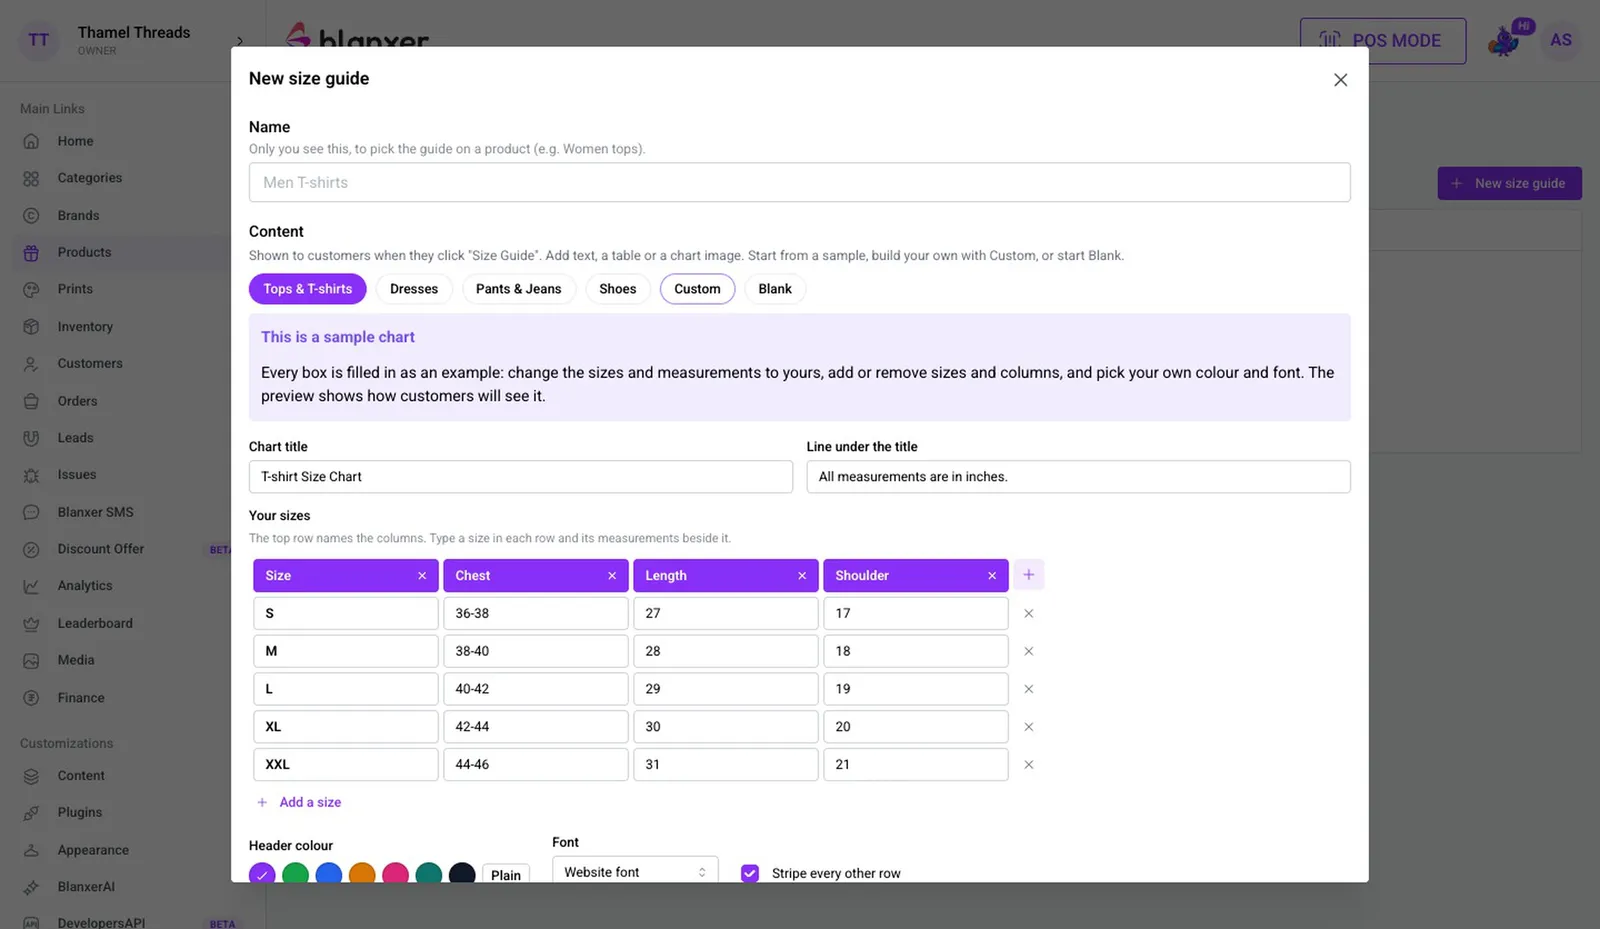
Click New size guide. It opens with a filled-in sample chart; samples cover tops, dresses, pants and shoes, or choose Custom or Blank.
- 4
Name it and fill in your sizes
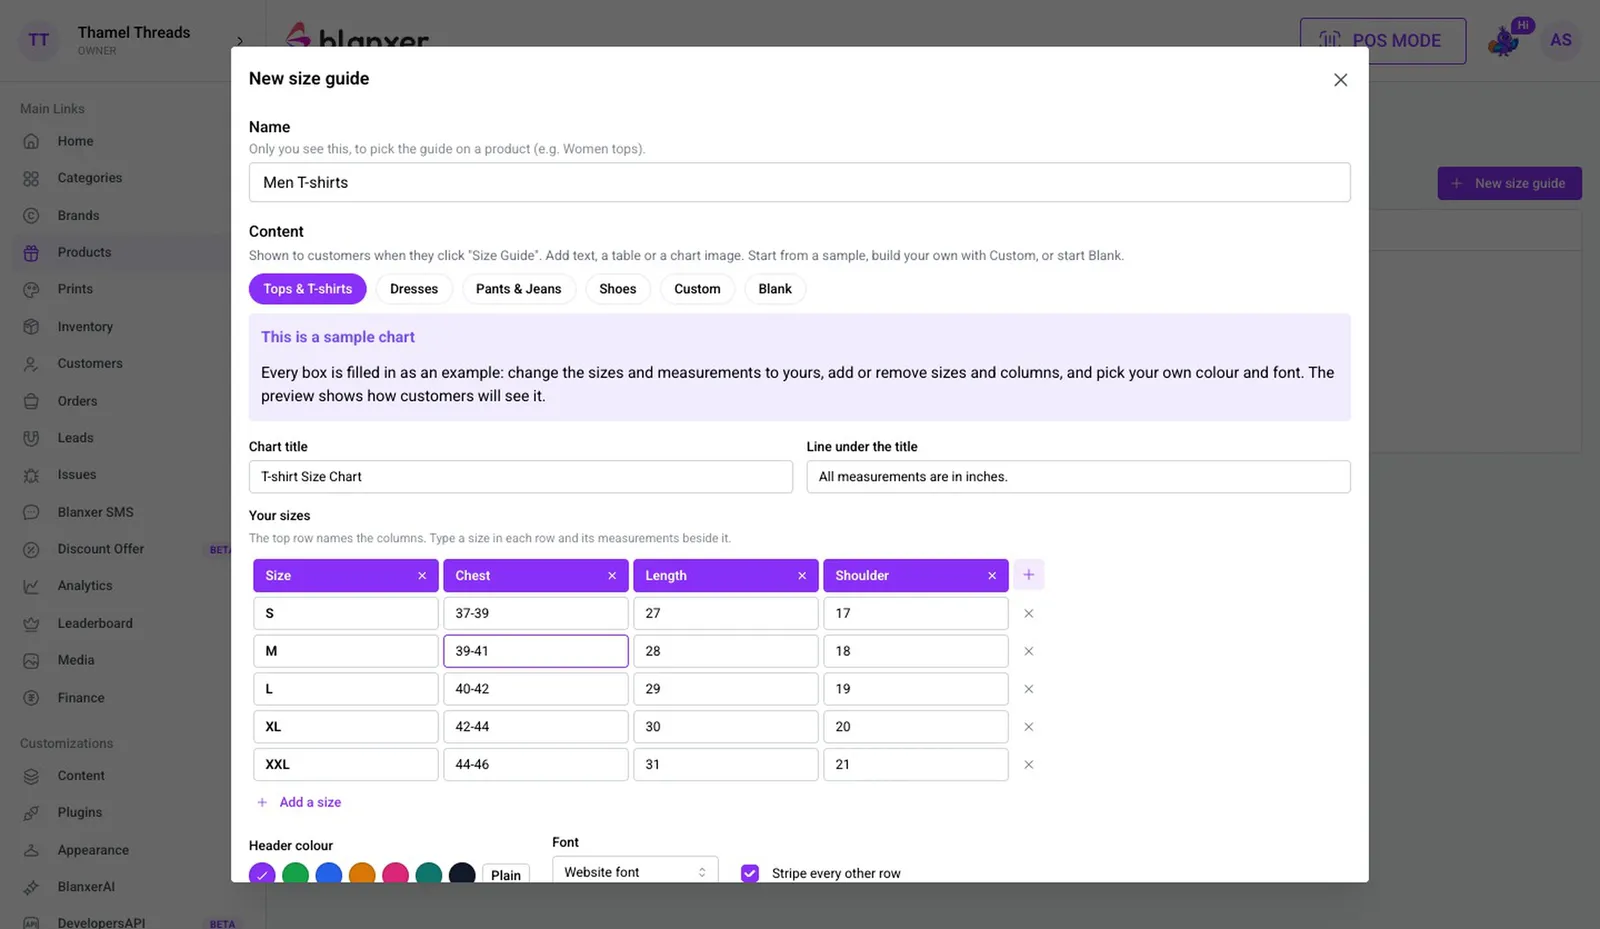
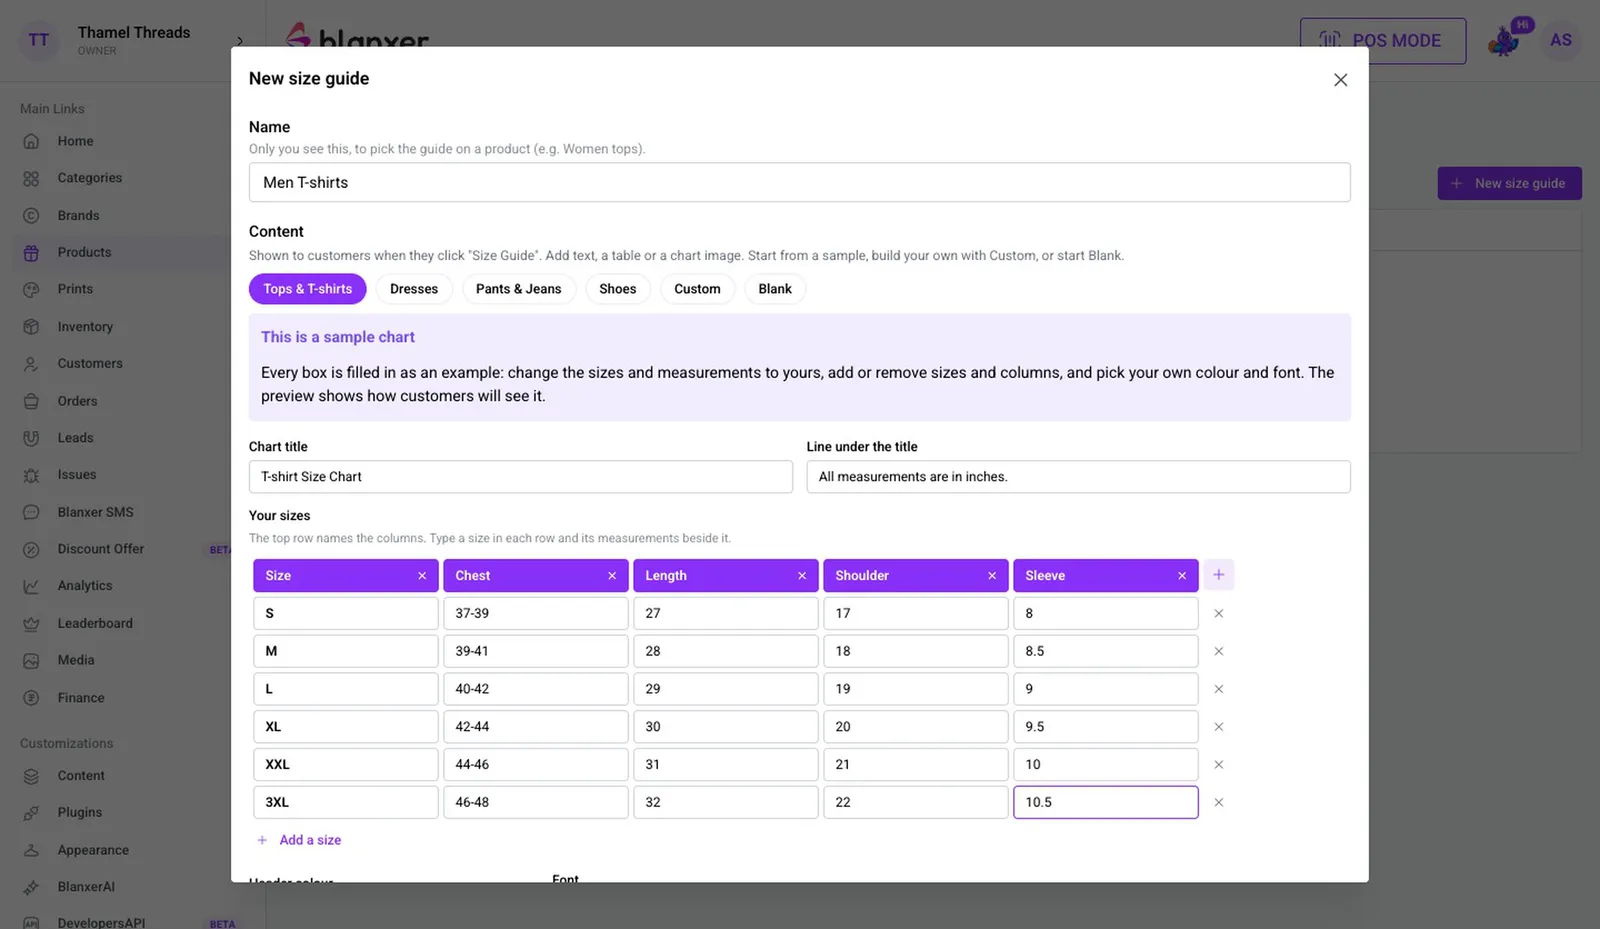
Give it a name such as Men T-shirts; only you see it, to pick the guide on products. In Your sizes the top row is the column names; enter each size's measurements from your own garments.
- 5
Add sizes and columns
Click Add a size to add one like 3XL, and use the × to remove a size you don't need. Add a column adds a new measurement, e.g. Sleeve.
- 6
Style it and check the preview
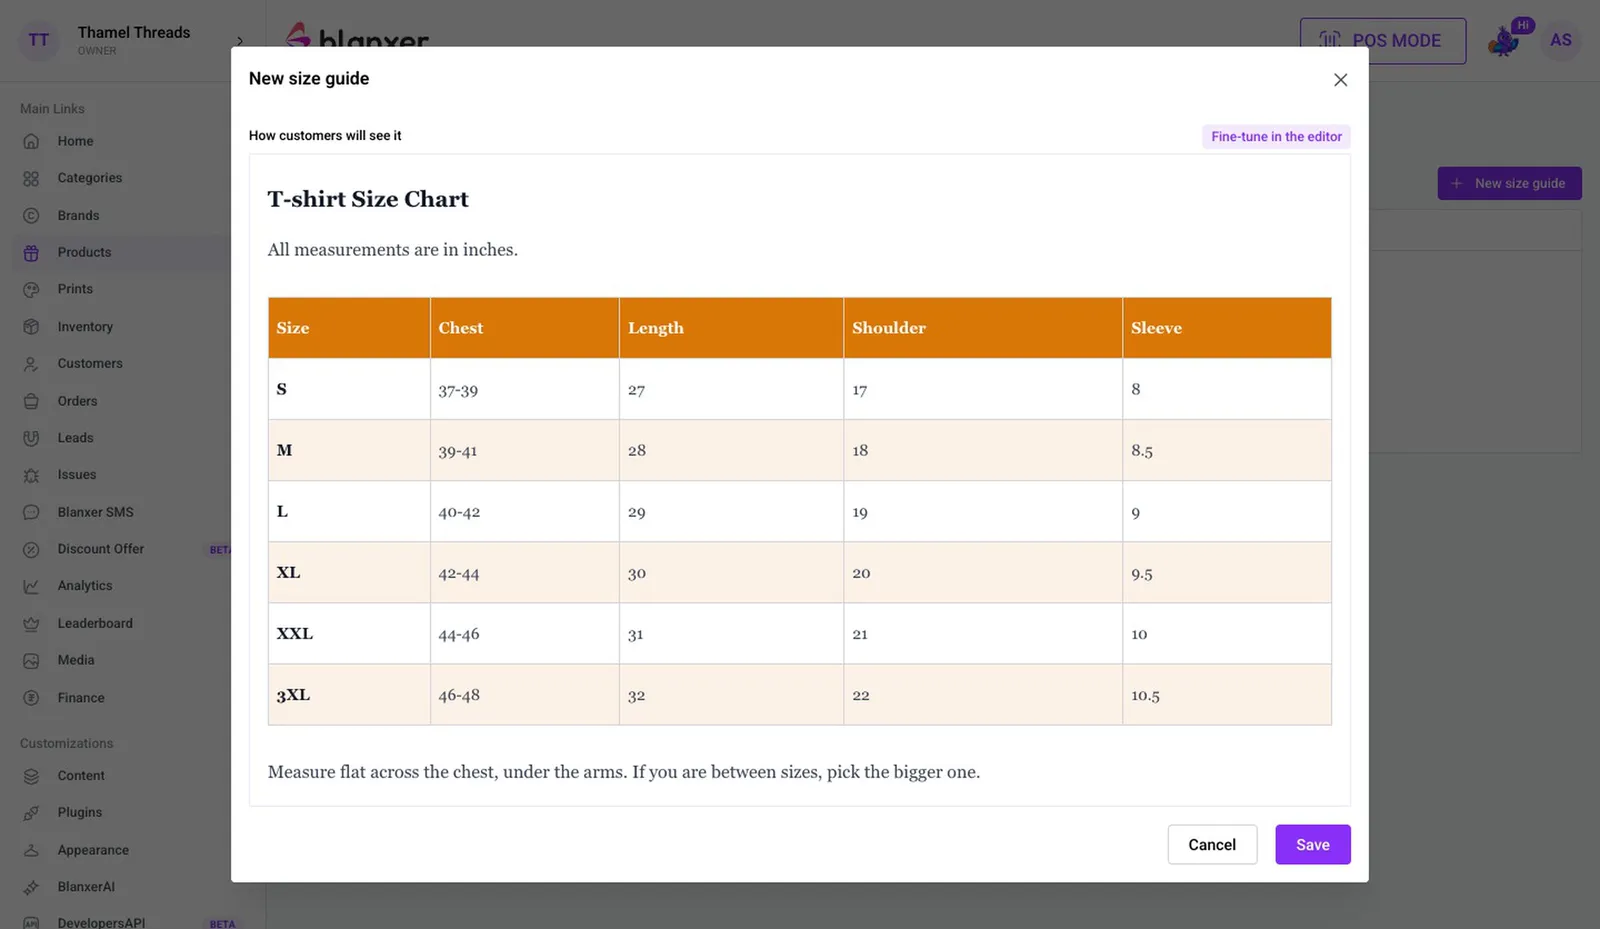
Pick a Header colour, turn on Stripe for easier reading, choose a Font and write a short note on how to measure. The preview shows what the customer sees and updates as you type; Fine-tune in the editor adds photos, links and cell colours.
- 7
Save
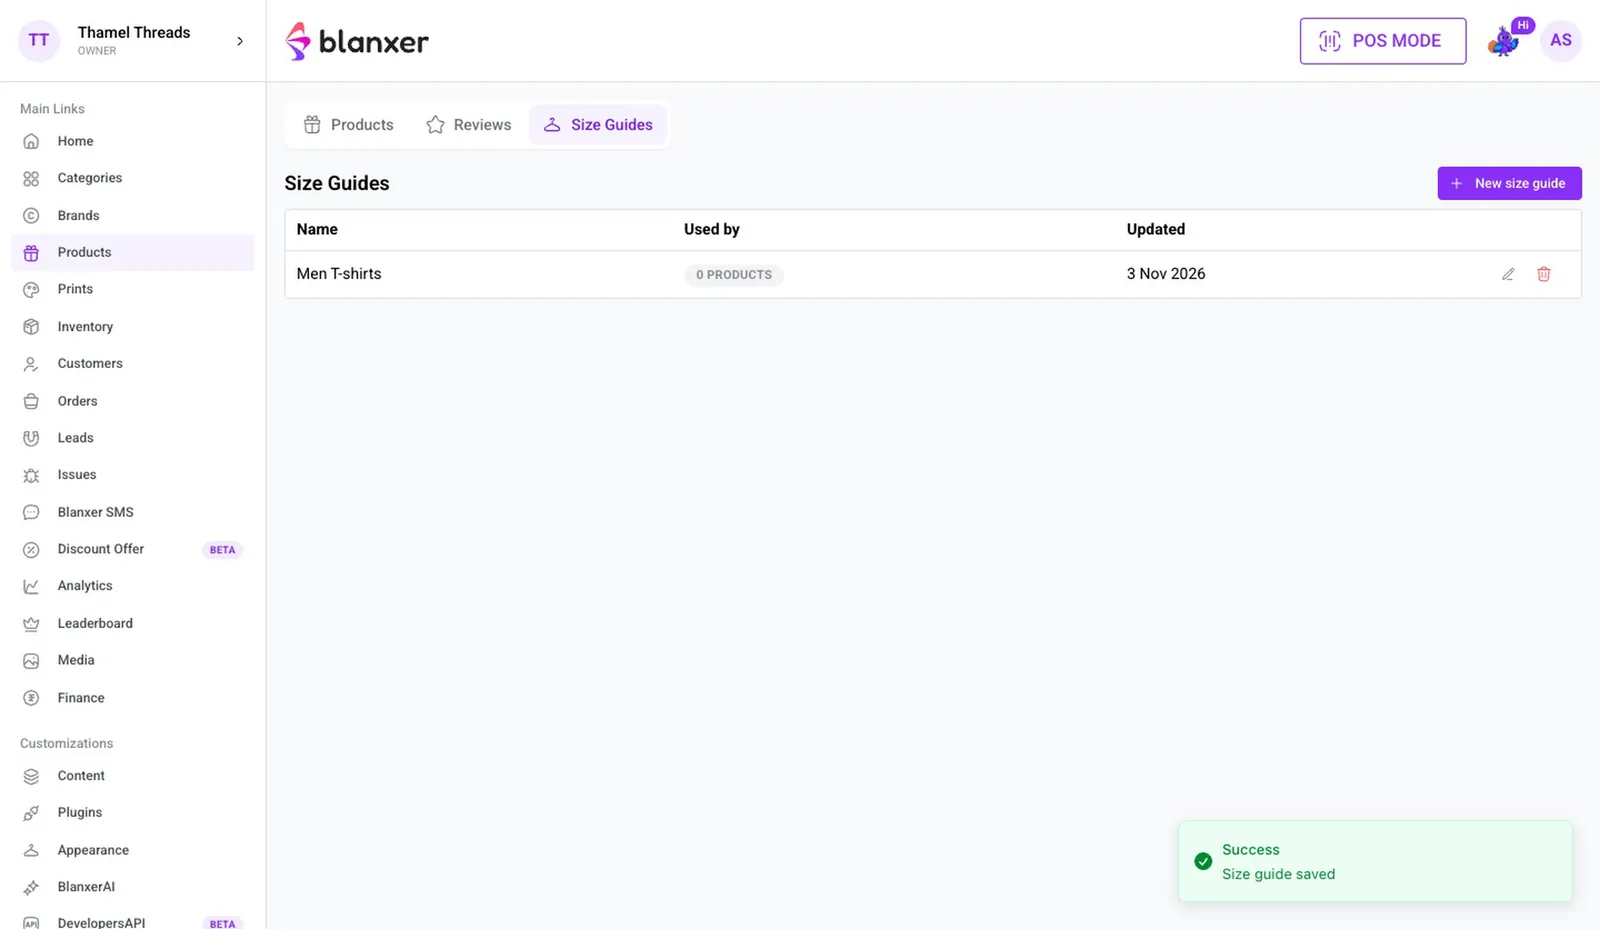
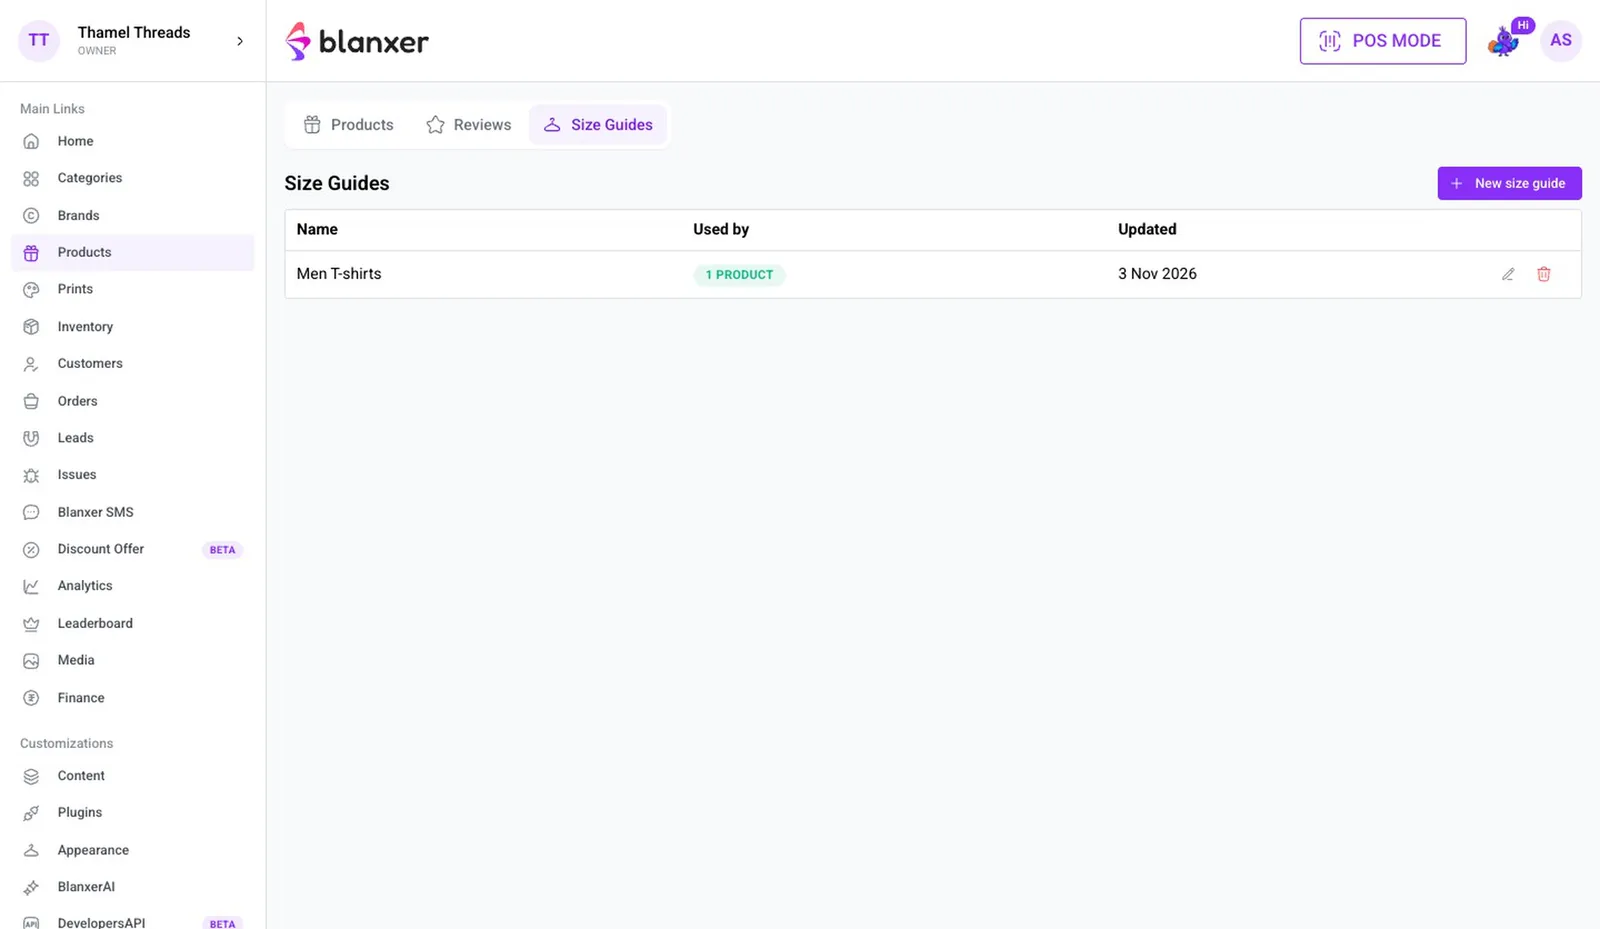
Click Save. The guide joins the list, and Used by shows how many products use it.
Part 3
Add it to your products
- 8
Choose the guide on the product
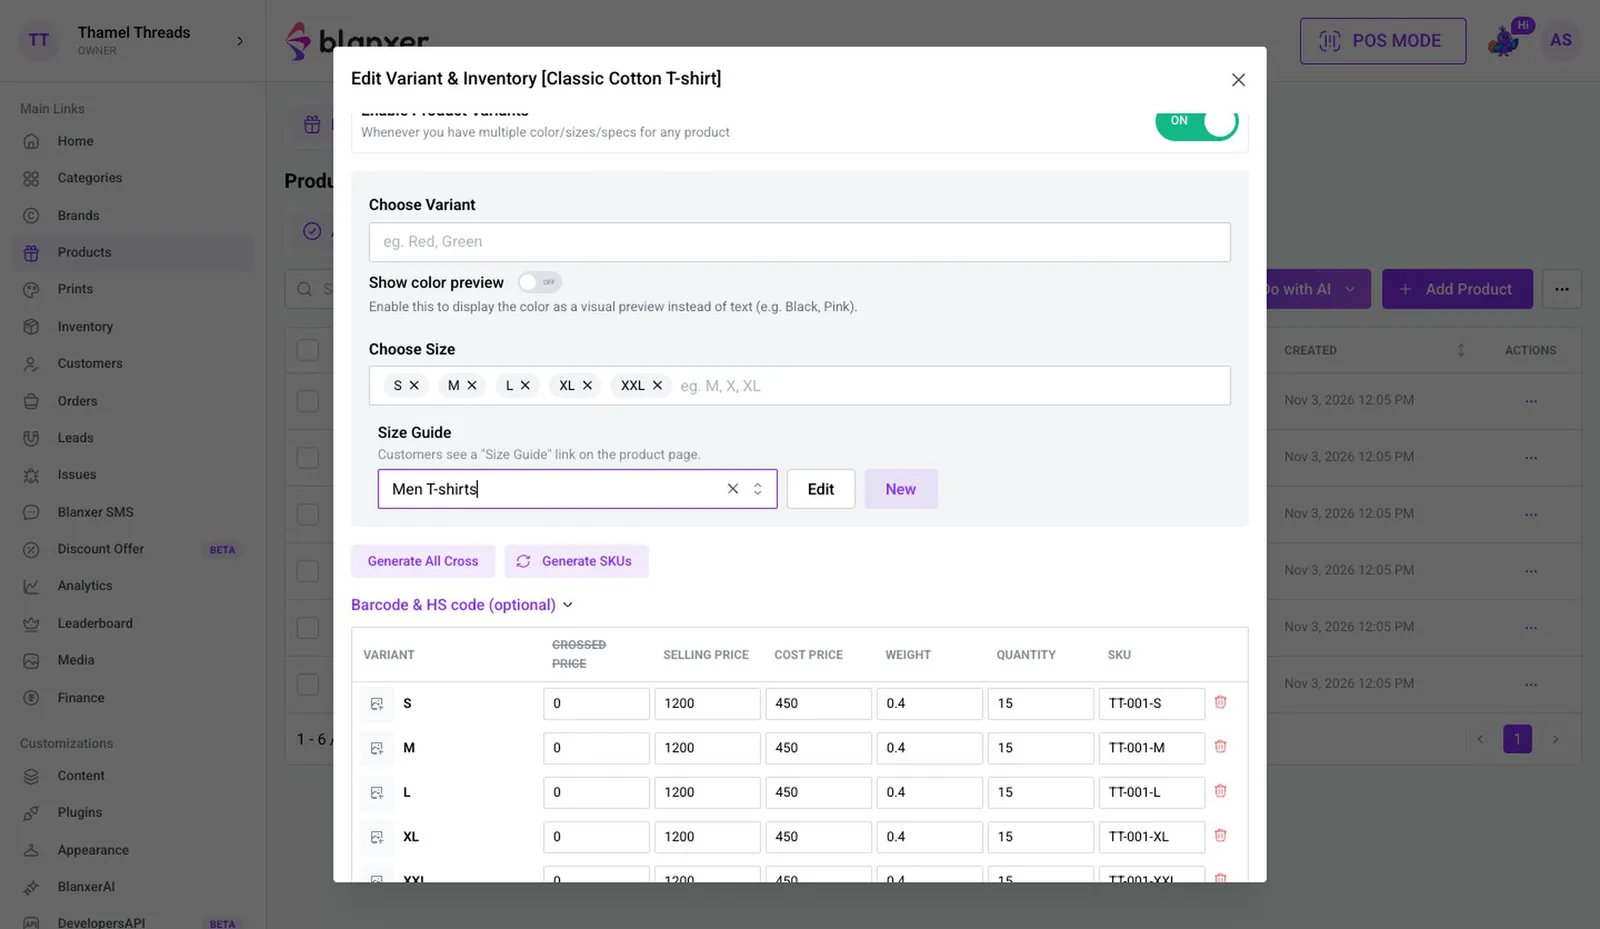
Open the product, click Edit Price & Inventory, choose the guide in Size Guide below the sizes, and Save. You can also create or edit a guide from here, or pick one in the variant step when adding a new product.
- 9
One guide for many products
Used by now counts the product. One guide can serve all your T-shirts.
Part 4
What your customer sees
- 10
The Size Guide link
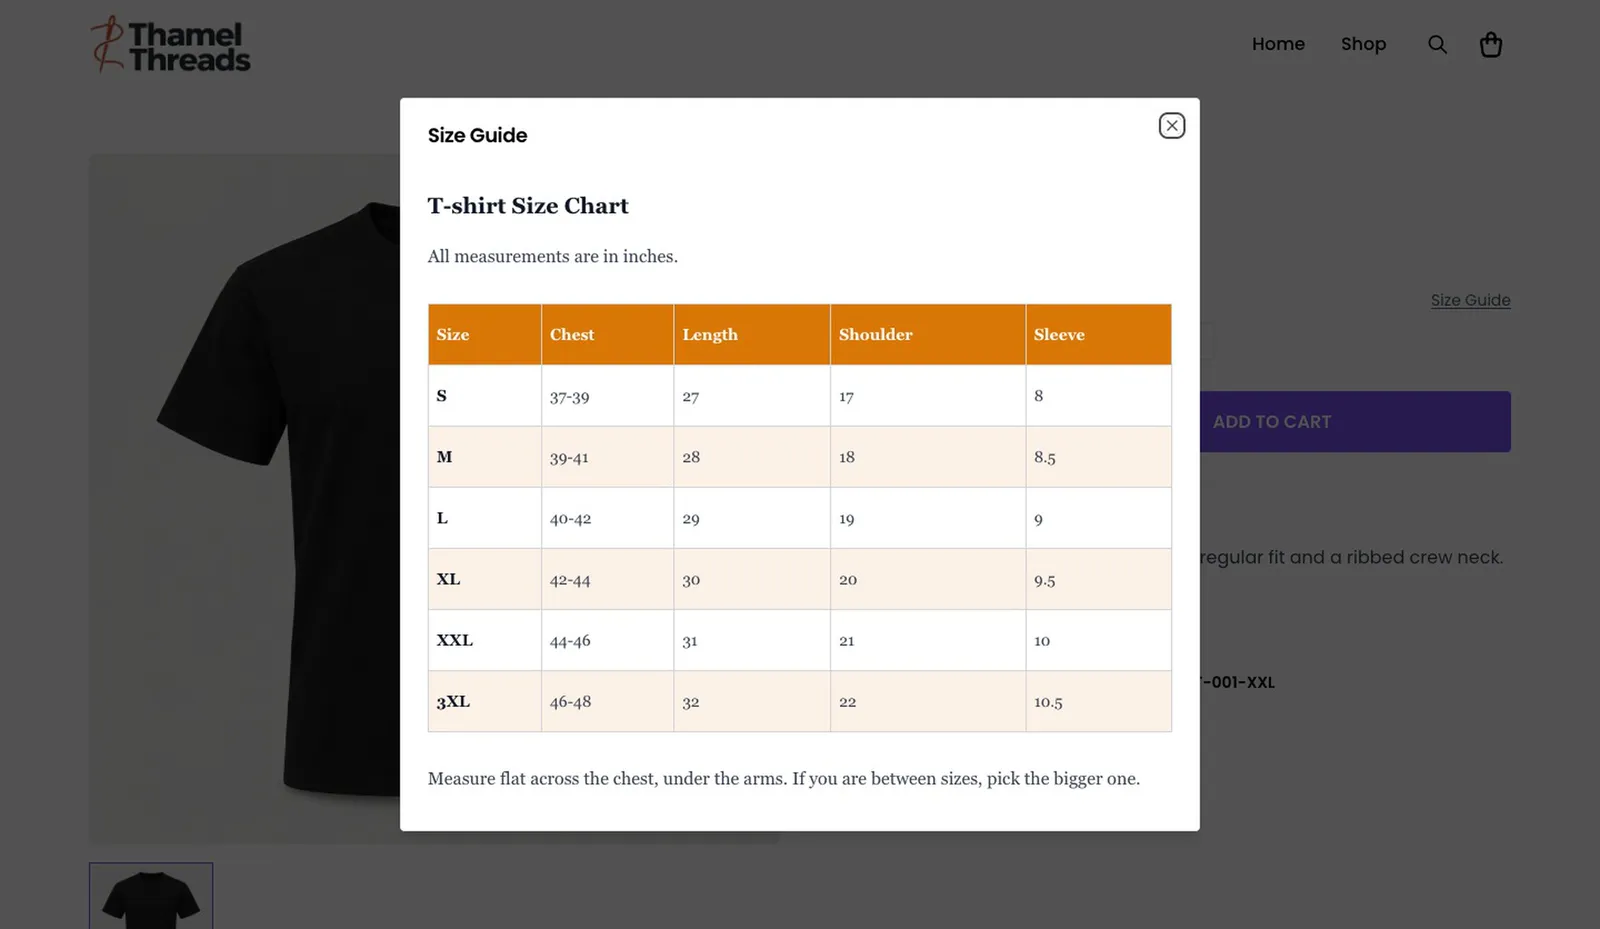
On the product page, a Size Guide link sits next to the sizes. It opens your chart in the same colours and font, and the customer compares it with their own measurements.
- 11
They pick the right size
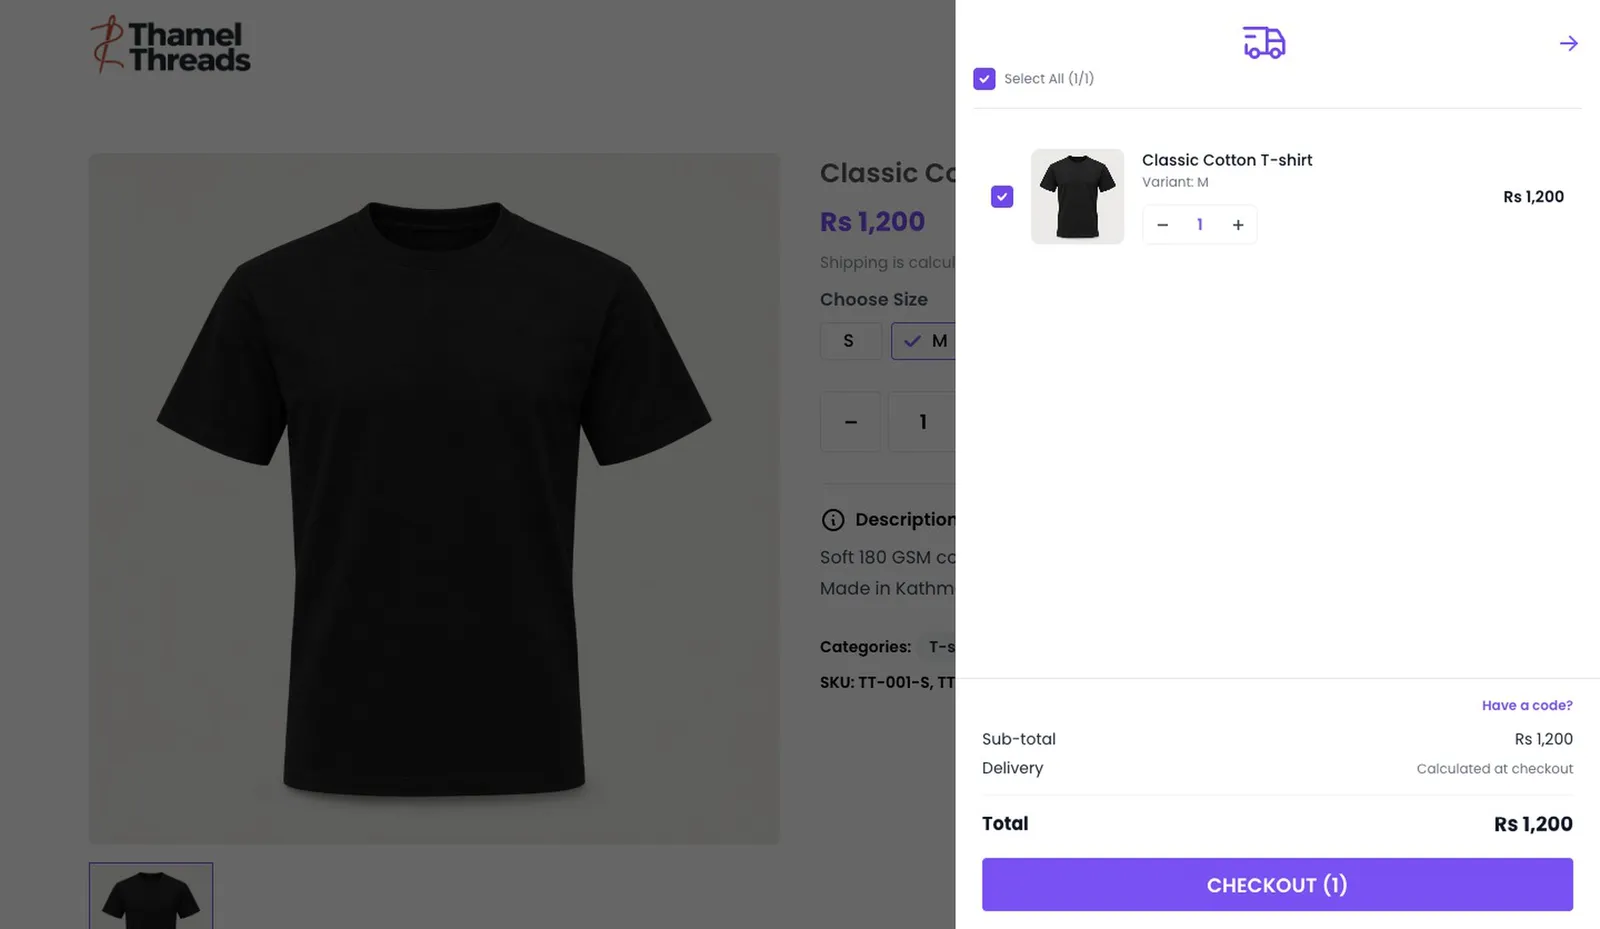
The customer picks a size, adds to cart and checks out as usual.
- 12
The size shows on the order
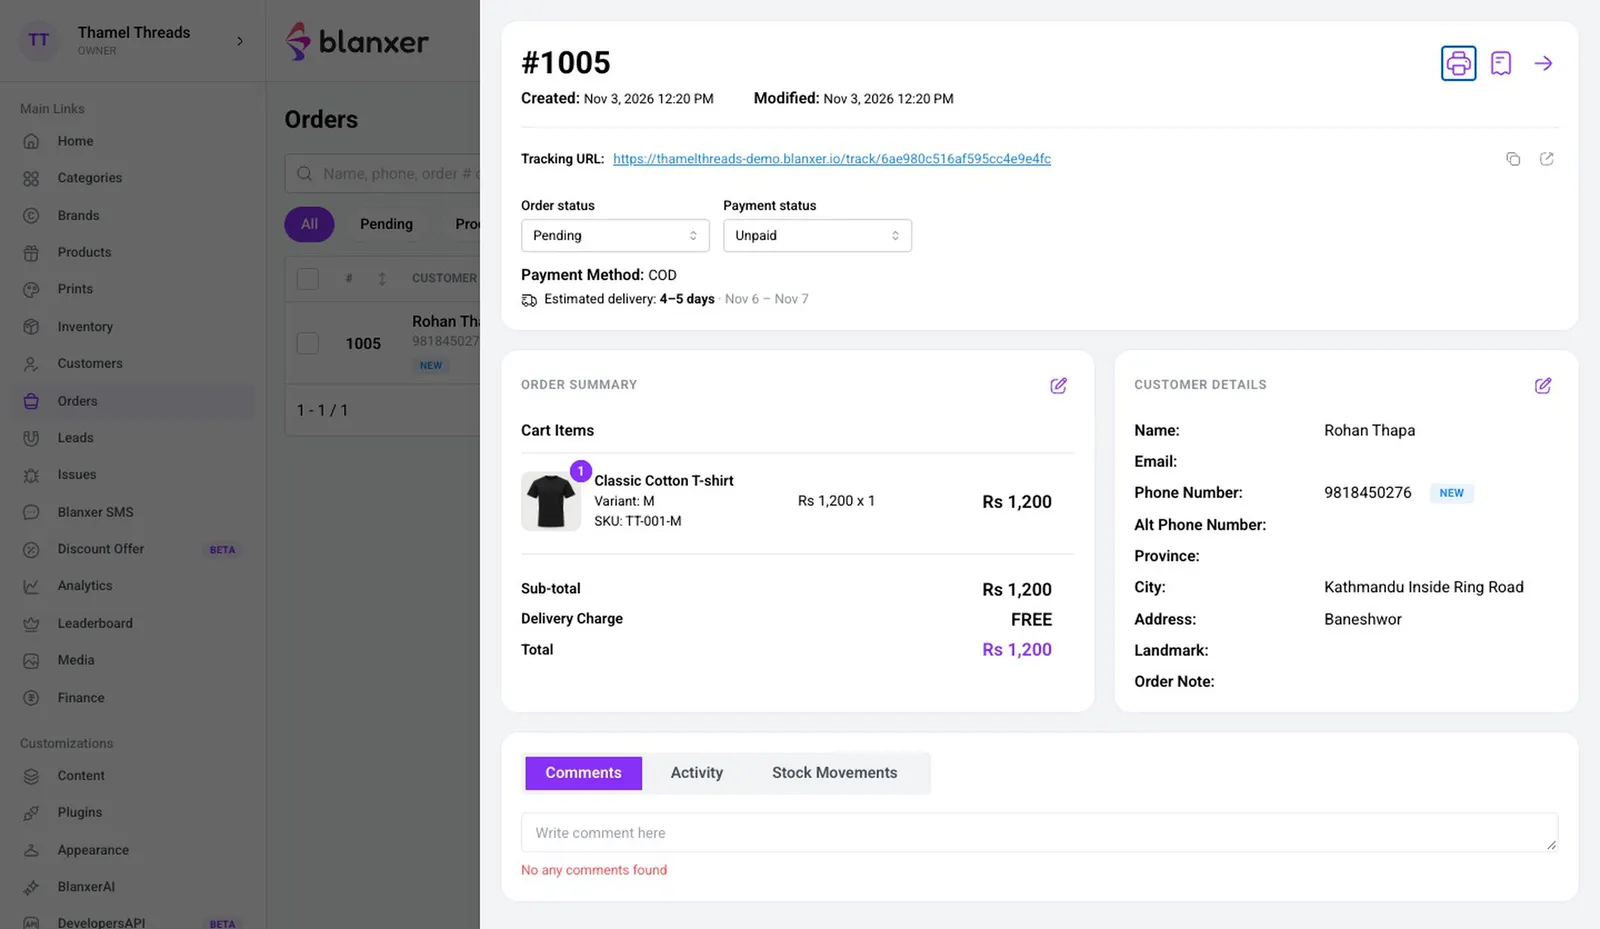
In your dashboard, the order shows the size the customer chose.
Good to know
- Size Guide is an optional plugin; install it only if your products have sizes.
- Edit a guide once and every product using it shows the new chart automatically.
More videos
All 33 videos 5:43
Products
Add products (normal inventory)
Add a product with its photos, price, variants and stock, for stores on normal inventory.
 6:18
Products
Add products (advanced inventory)
Add a product and stock it in per outlet, with its cost, for stores on advanced inventory.
 6:19
Products
Set up and print barcode labels
Set up your barcode label size and what it shows, then print labels for your products to stick on and scan at the counter.
See Blanxer with your own business in mind.
Book a demo. We'll show you the store, checkout, POS and dashboard, and tell you honestly which plan you need.
Prefer to talk directly?
Already a customer? Support on WhatsApp +977 9802344850, Sun–Fri, 9 AM – 6 PM.
Follow Blanxer
 A Blanxer product
One AI inbox for every customer conversation.
Sambad.io brings WhatsApp, Instagram, Facebook, website chat and email into one inbox. Connect your Blanxer store and its AI answers from your catalogue, checks stock, quotes delivery and places the order right in the chat.
- Website chat
- Gmail
- Outlook
- Zoho Mail