
Add products (advanced inventory)
Add a product and stock it in per outlet, with its cost, for stores on advanced inventory.
Products · 6:18 · In Nepali
Add a product on an advanced-inventory store in four steps. Stock goes into an outlet at the end, with its cost, supplier and expiry recorded, and the barcode labels are ready to print right away.
Part 1
Add the product details
- 1
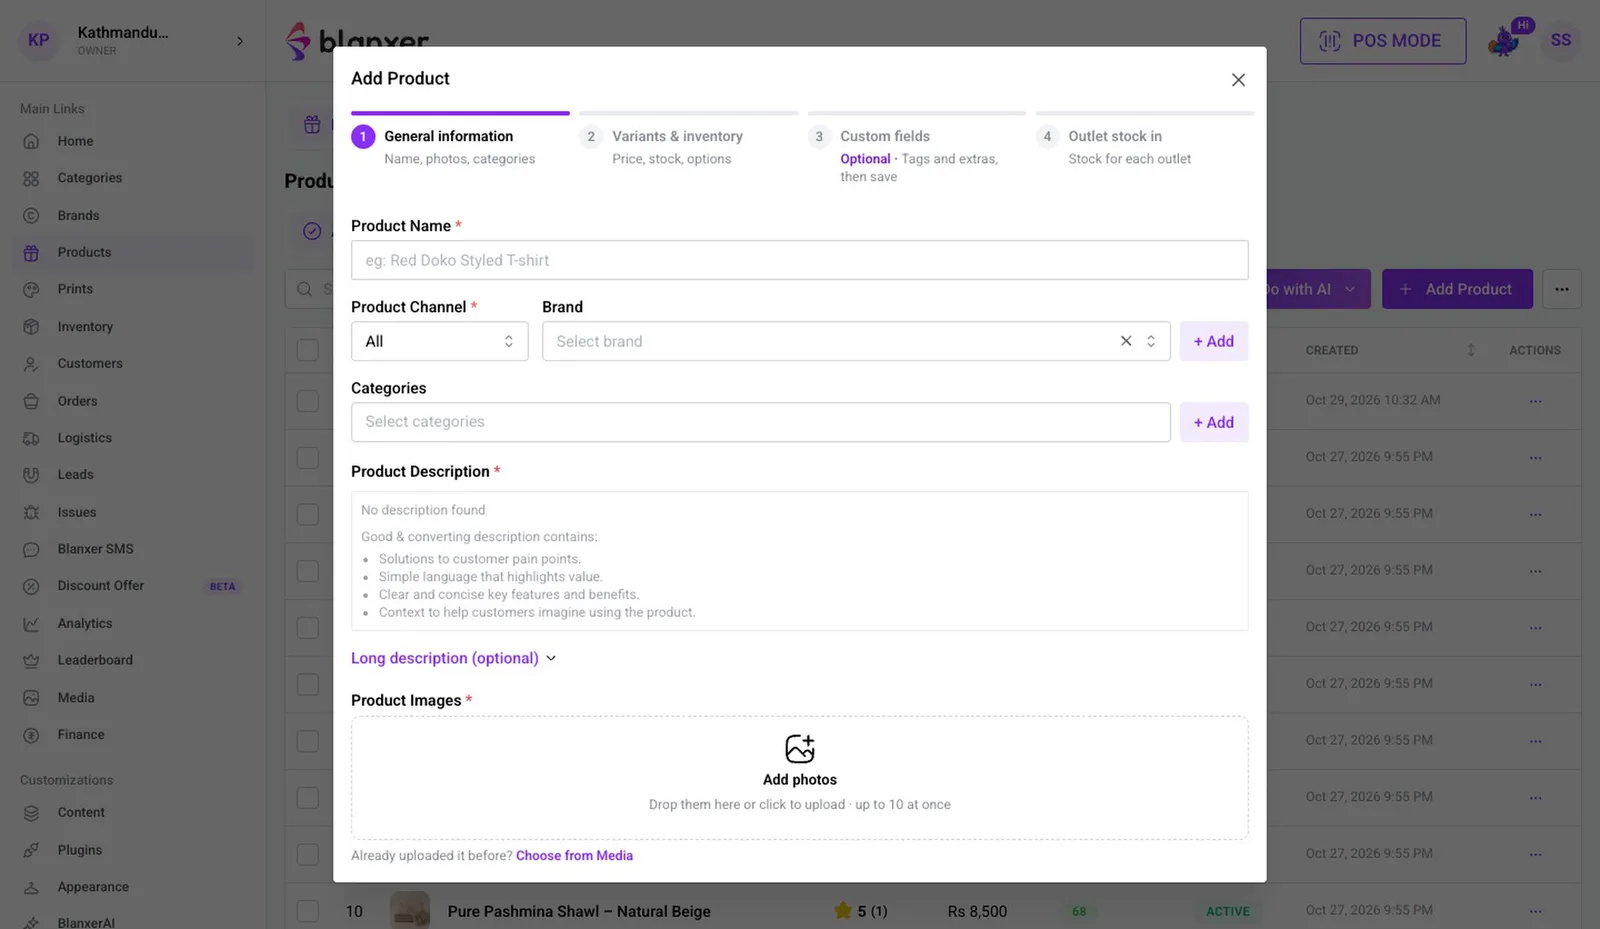
Open Add Product
On Products, click Add Product. Four steps open, and the guide at the top shows which step you're on.
- 2
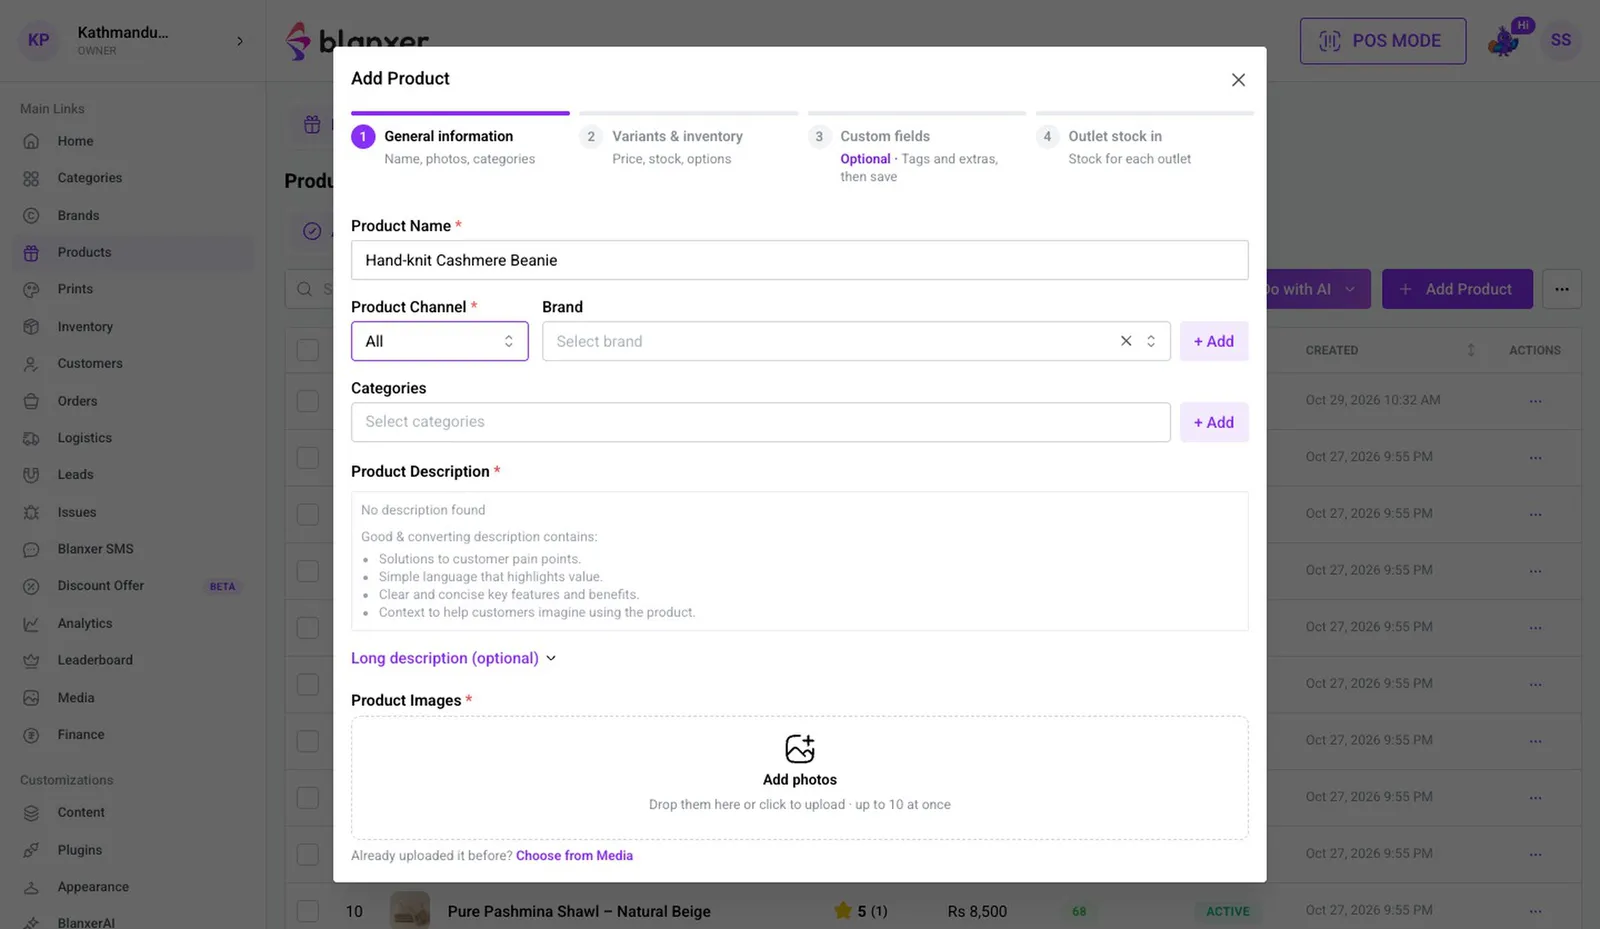
Name it and pick the channel
Type the product name; the website link is made from it. In Product Channel, All sells on the website and at the counter, while POS keeps it off the website and then a photo isn't required.
- 3
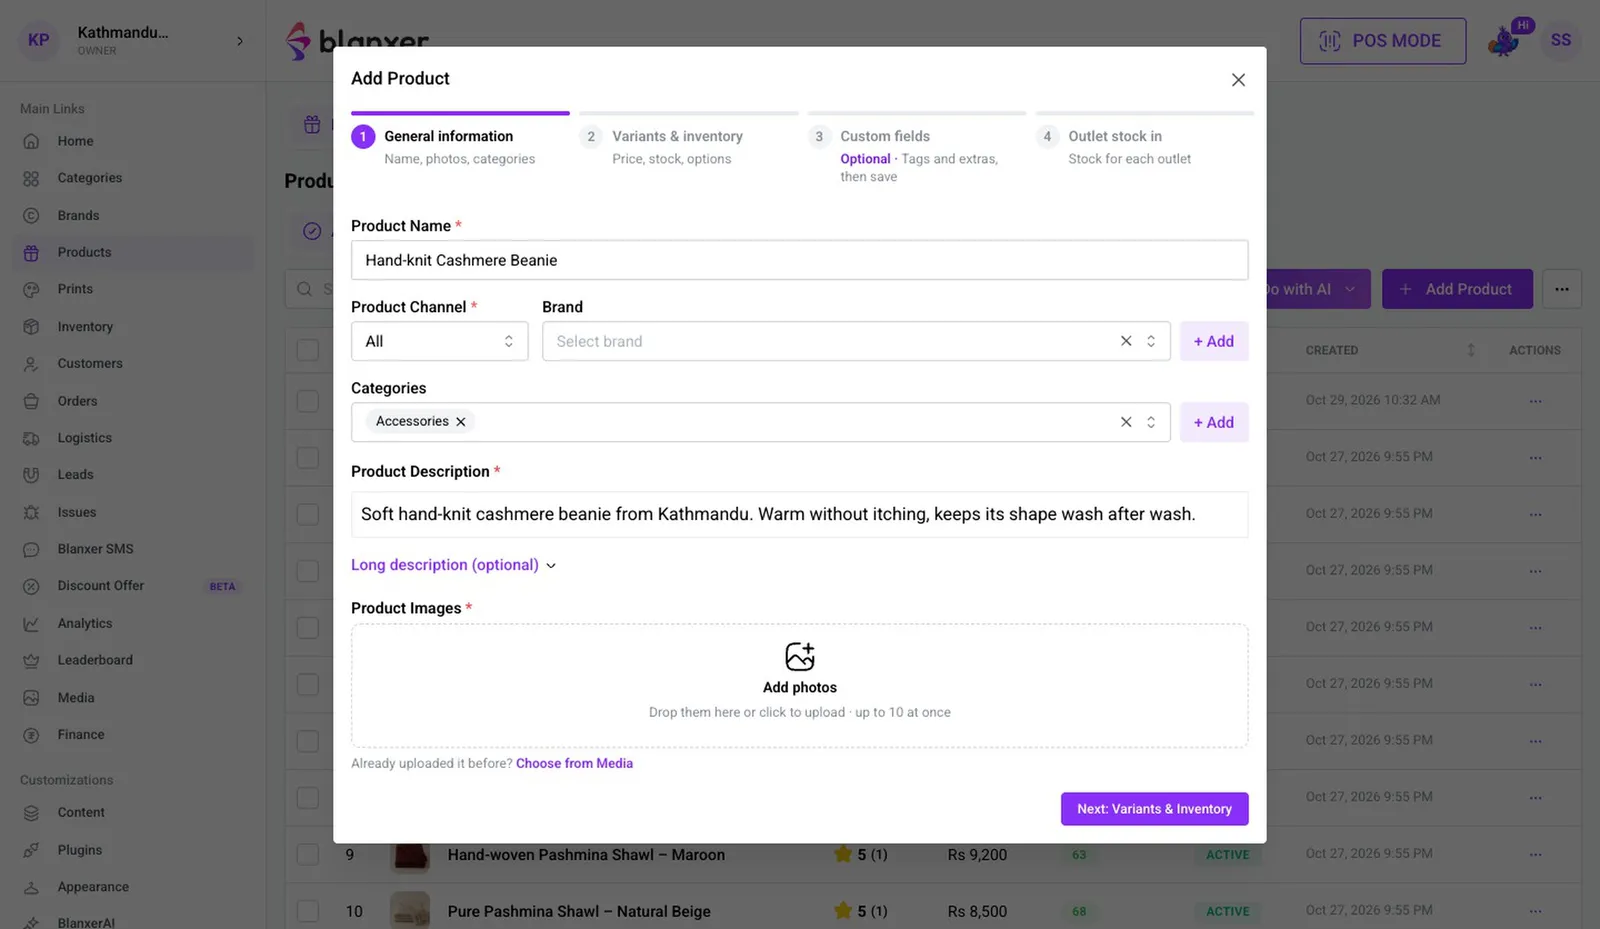
Category and description
Pick a brand and category, or create one on the spot with + Add. The description needs at least 20 characters; the long description for fabric, size and care is optional.
- 4
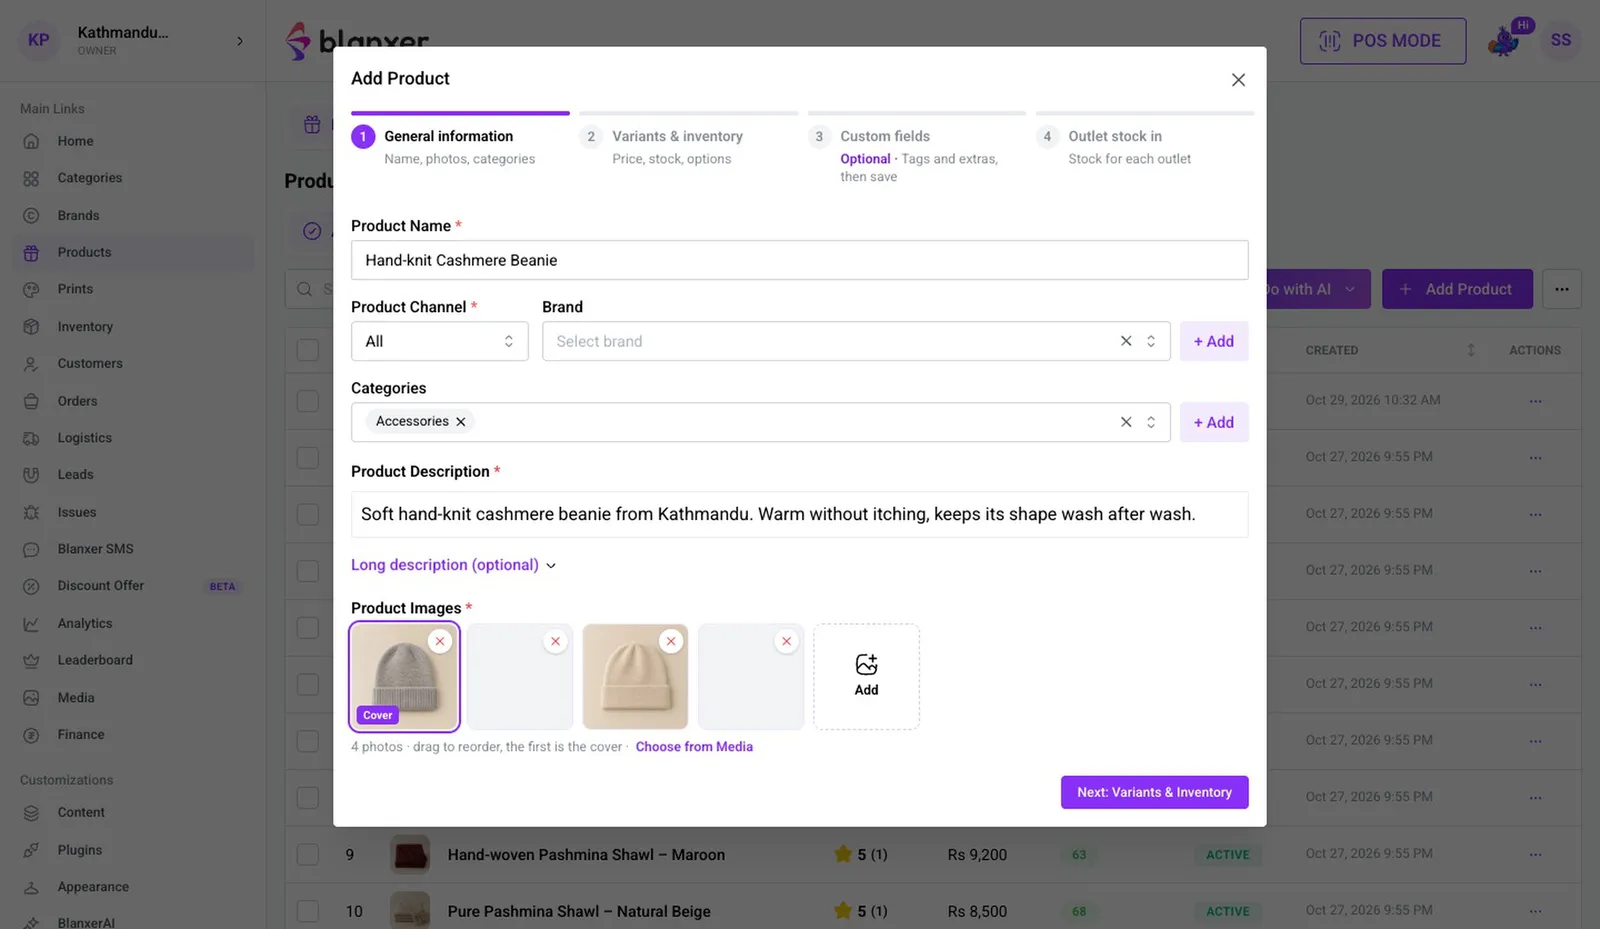
Add photos
Add up to 10 photos at once, crop each one and click Confirm Selection & Upload. The first photo is the cover, you can drag to reorder, and Choose from Media reuses photos you uploaded before.
Part 2
Price, variants and barcode
- 5
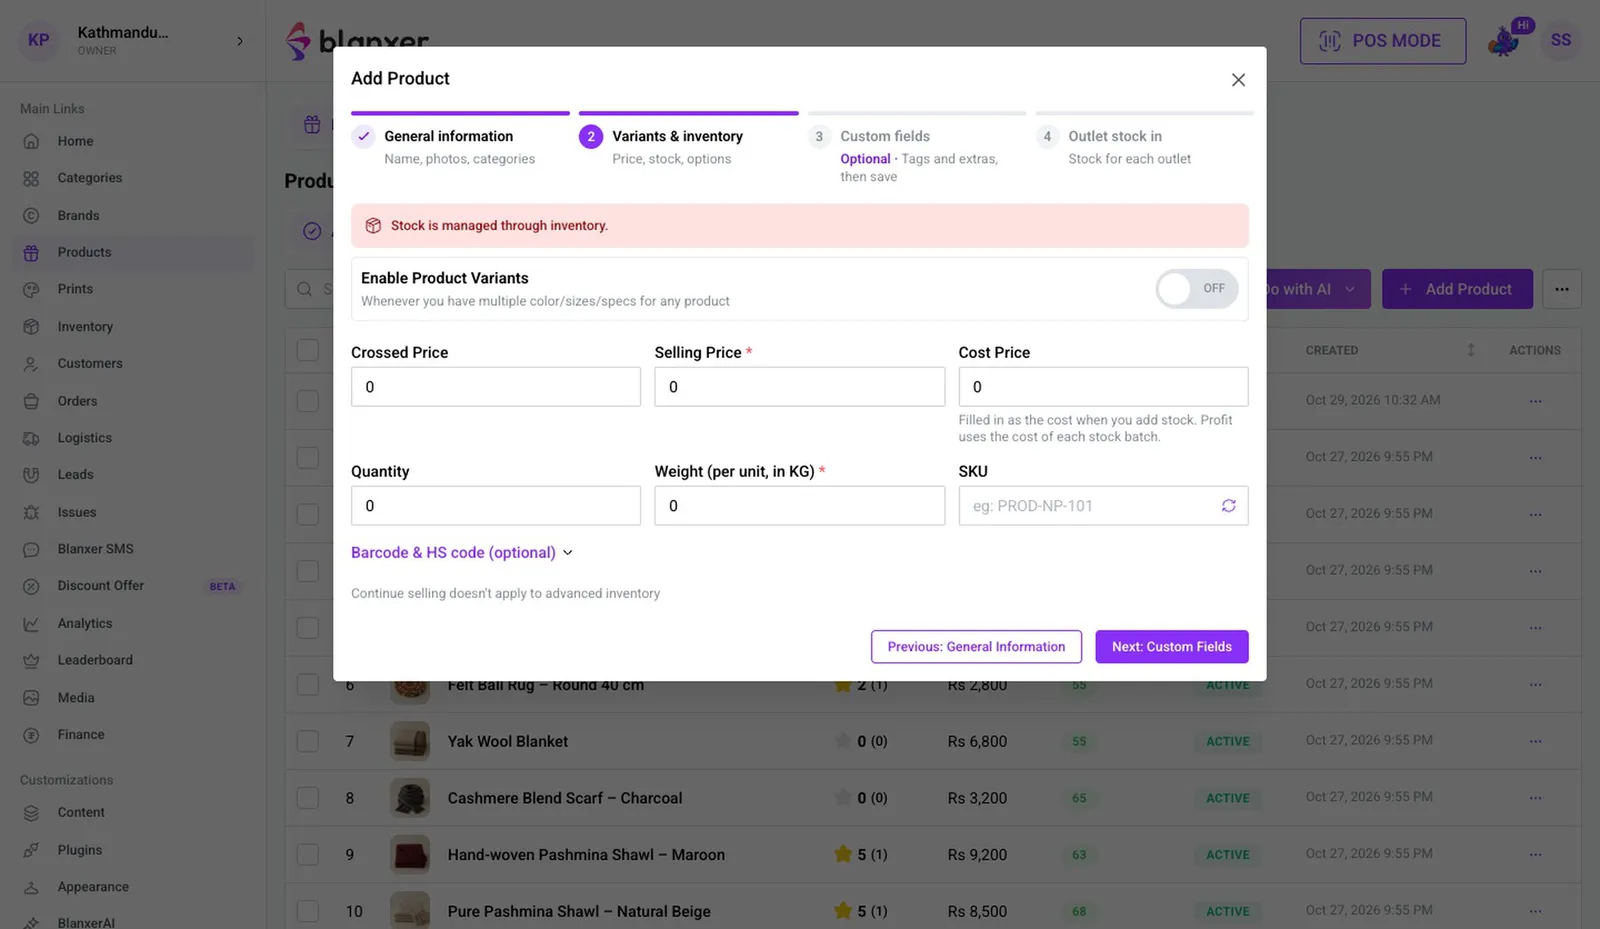
Set the prices
Enter the crossed-out price, selling price and cost price. The crossed-out price shows the discount, and the cost price is used to work out profit. Stock is added at the last step, and the quantity you type here fills in there.
- 6
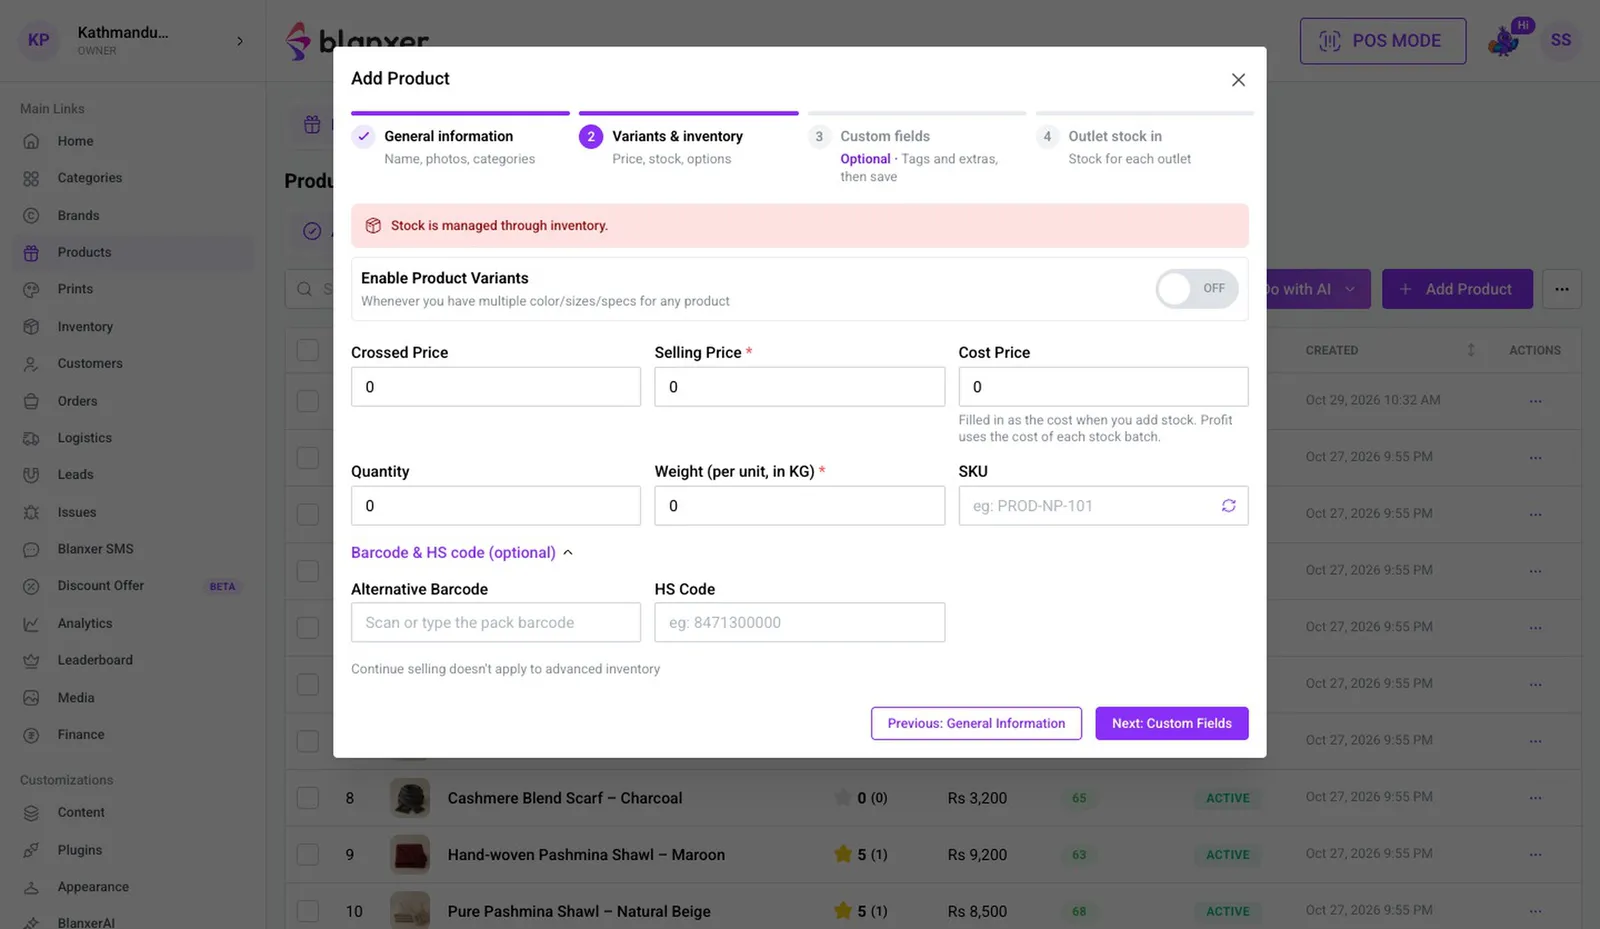
Weight, SKU and barcode
Weight drives weight-based delivery charges, and the SKU is one click. A barcode is made on save; if the packet already has the maker's barcode, scan it into Alternative Barcode under Barcode & HS code.
- 7
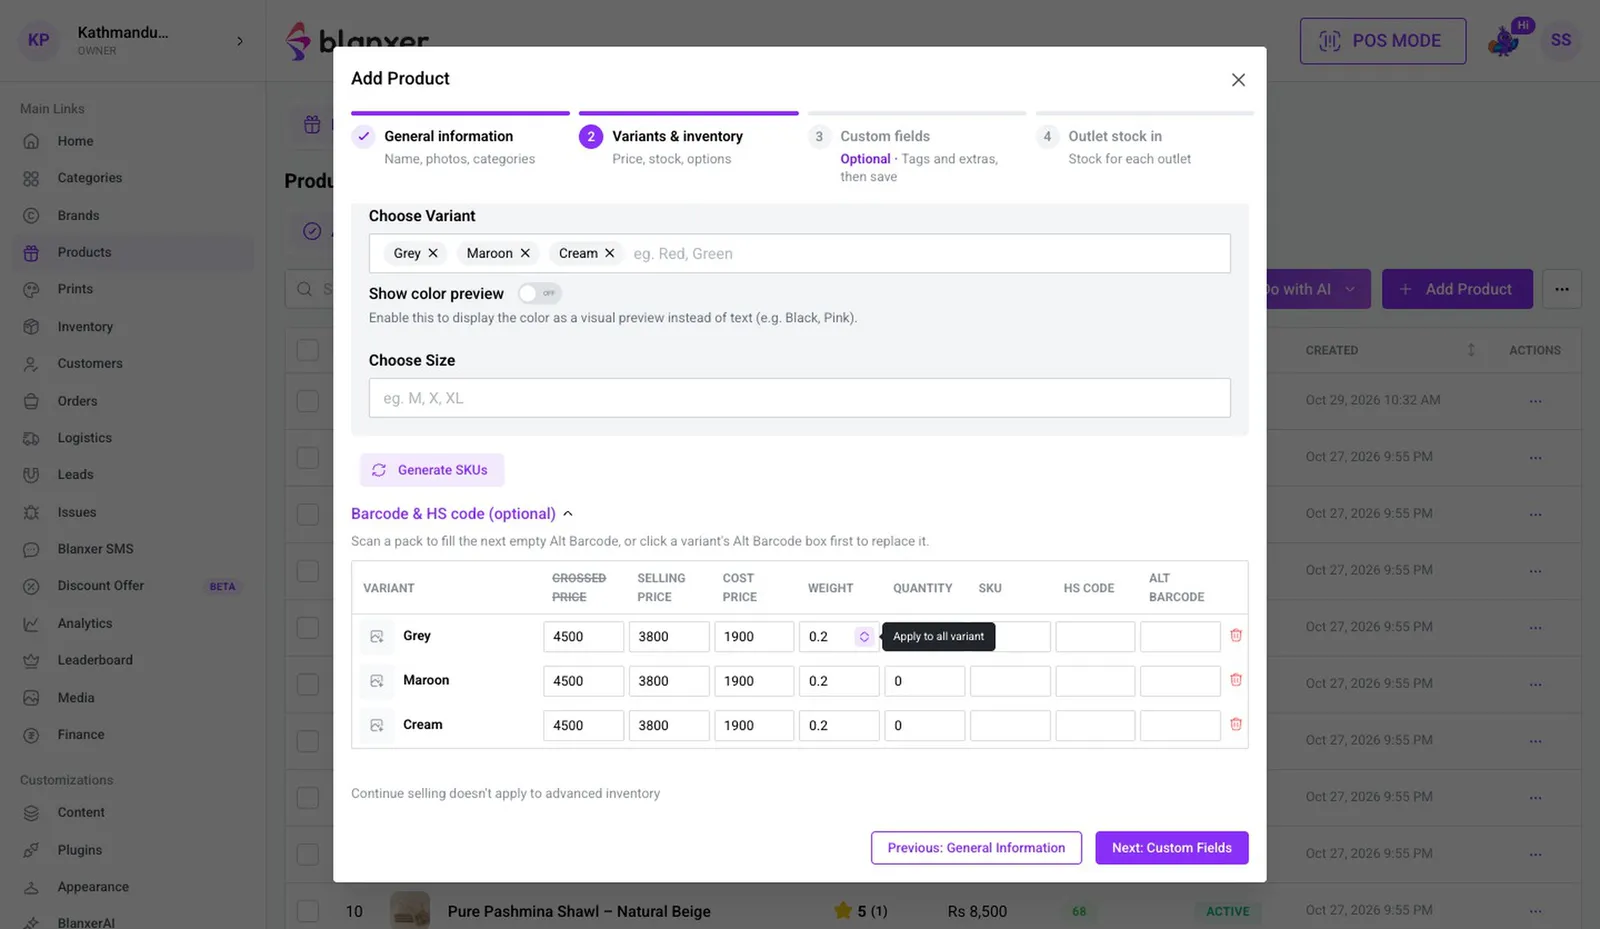
Add colours or sizes
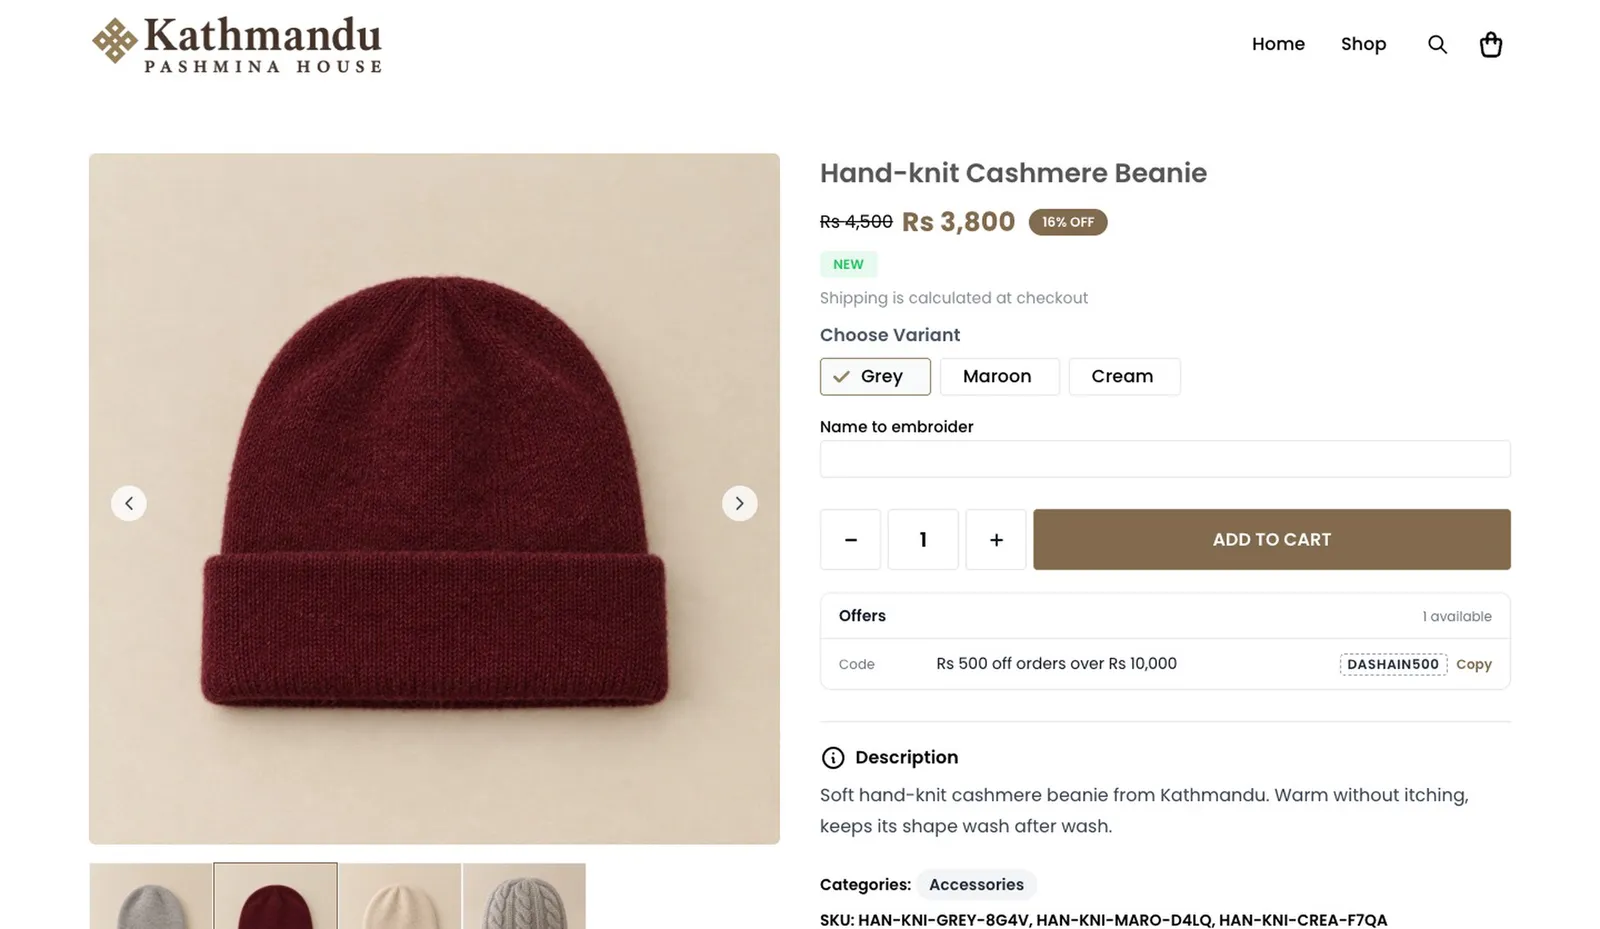
Turn on Enable Product Variants and type the colours, e.g. Grey, Maroon, Cream. Fill price and weight in one row and copy them to all, change any single row, enter each quantity and click Generate SKUs.
Part 3
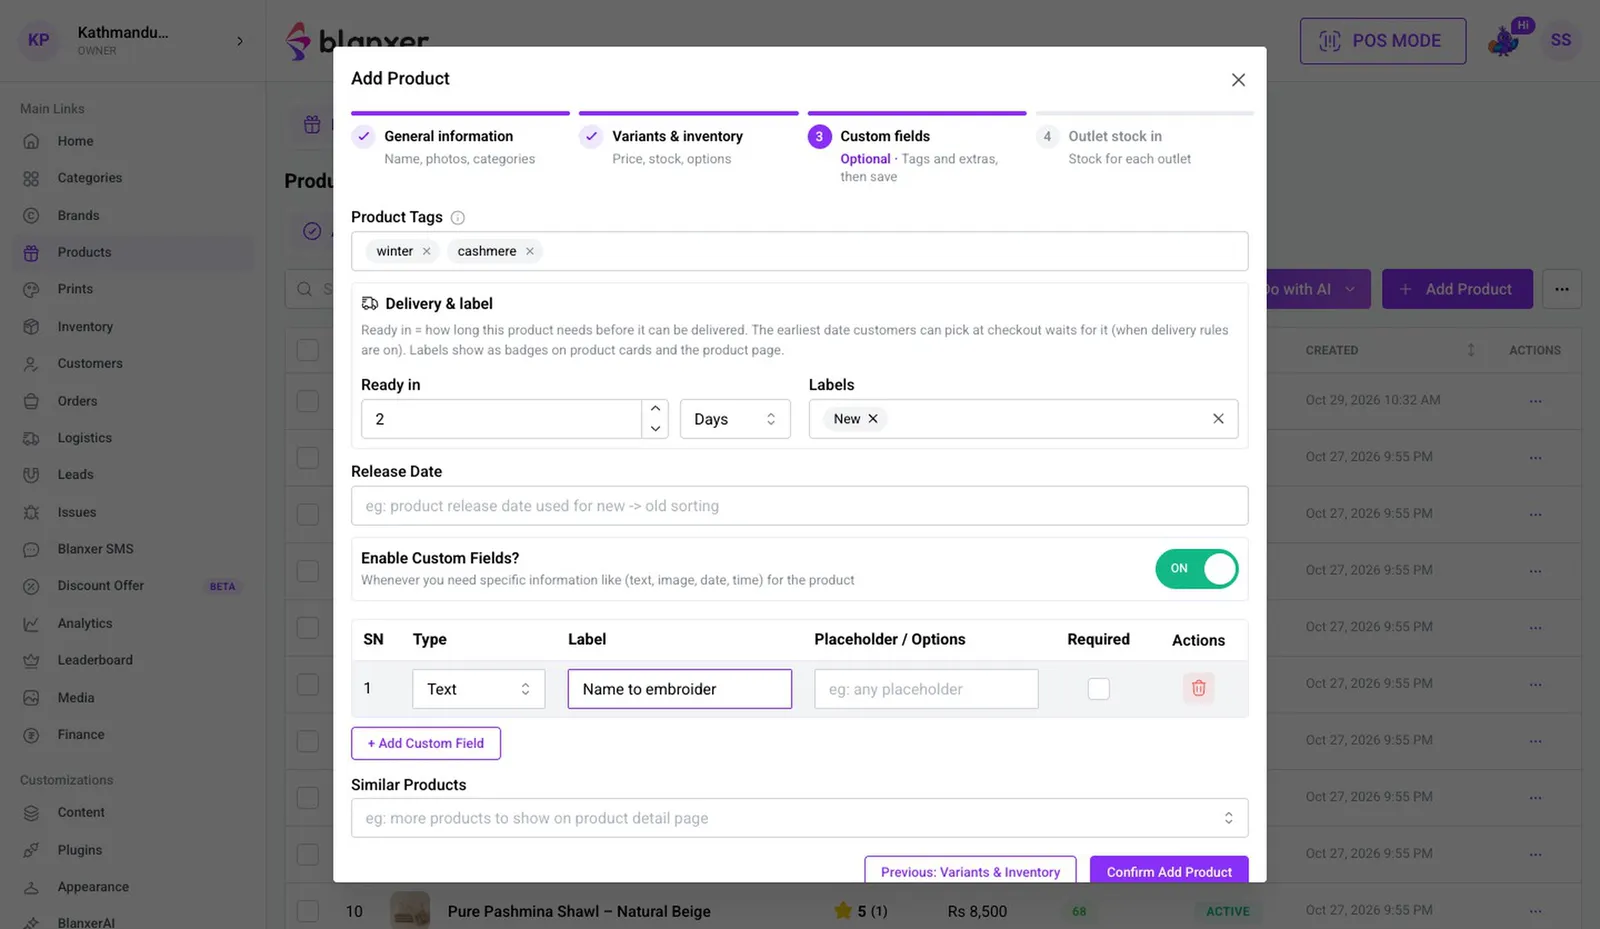
Tags and extras
- 8
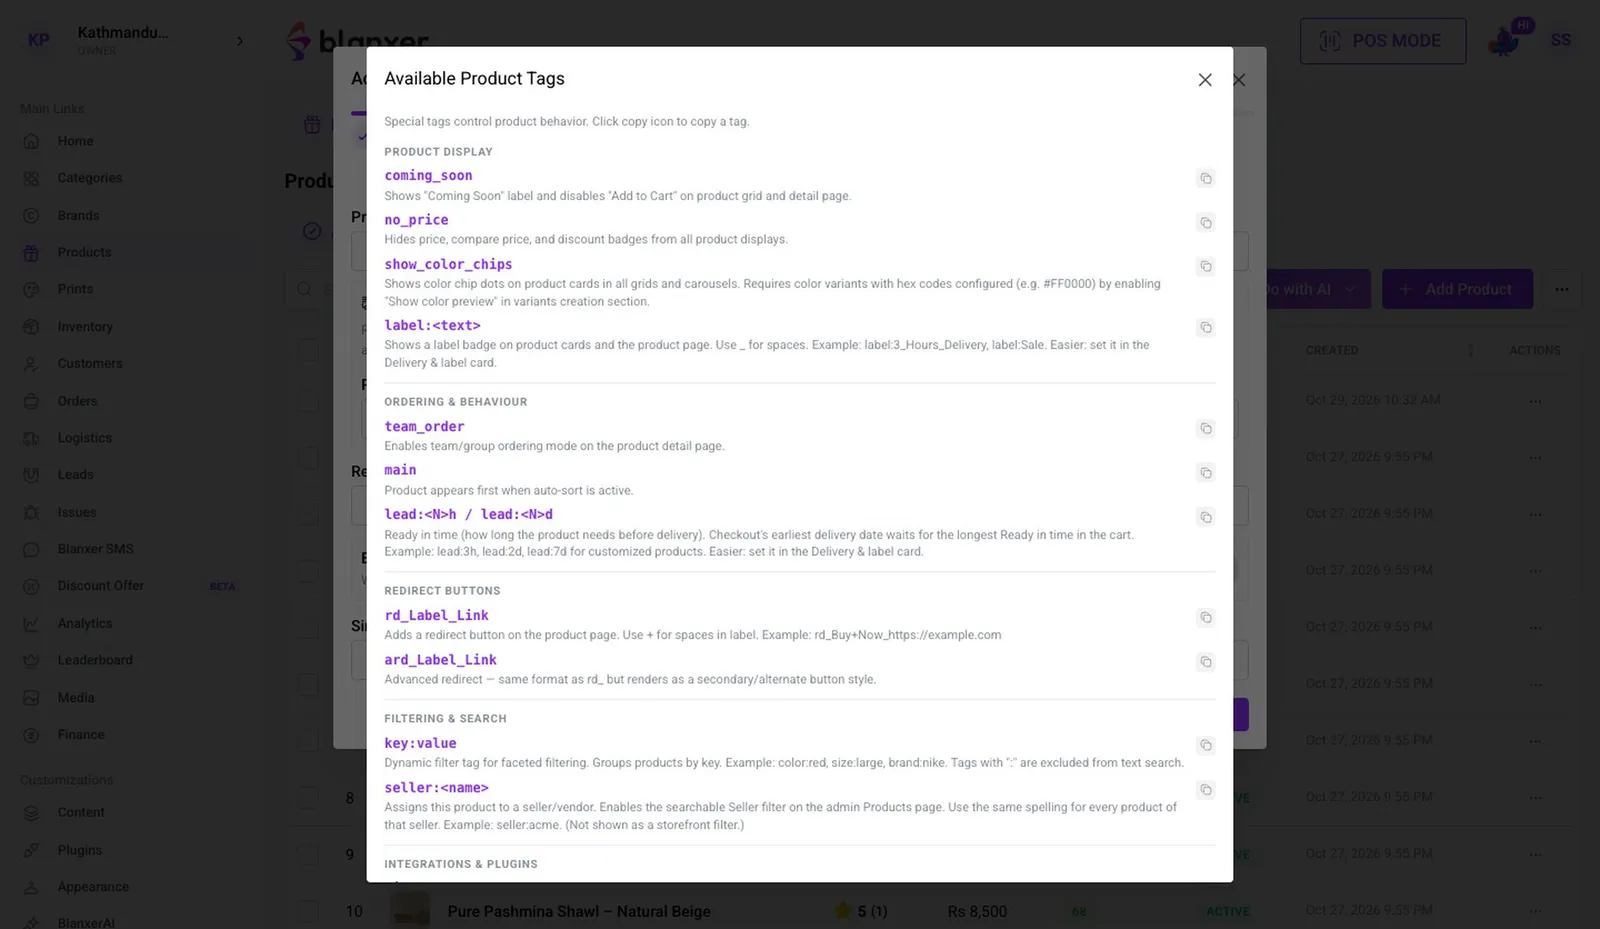
Add tags
Product Tags help the website's search. Special tags change the page: coming_soon, no_price, color: and fabric: filters, main to pin to the top, and rd_ for a custom button such as order on WhatsApp.
- 9
Label and custom fields
In Delivery & label, set the production time and a label like New, Sale or Express Delivery, which shows as a badge on the website. Enable Custom Fields to ask the customer something at order time, e.g. Name to embroider.
- 10
Save the product
Click Confirm Add Product. The product is saved and goes live on the website.
Part 4
Stock in at an outlet
- 11
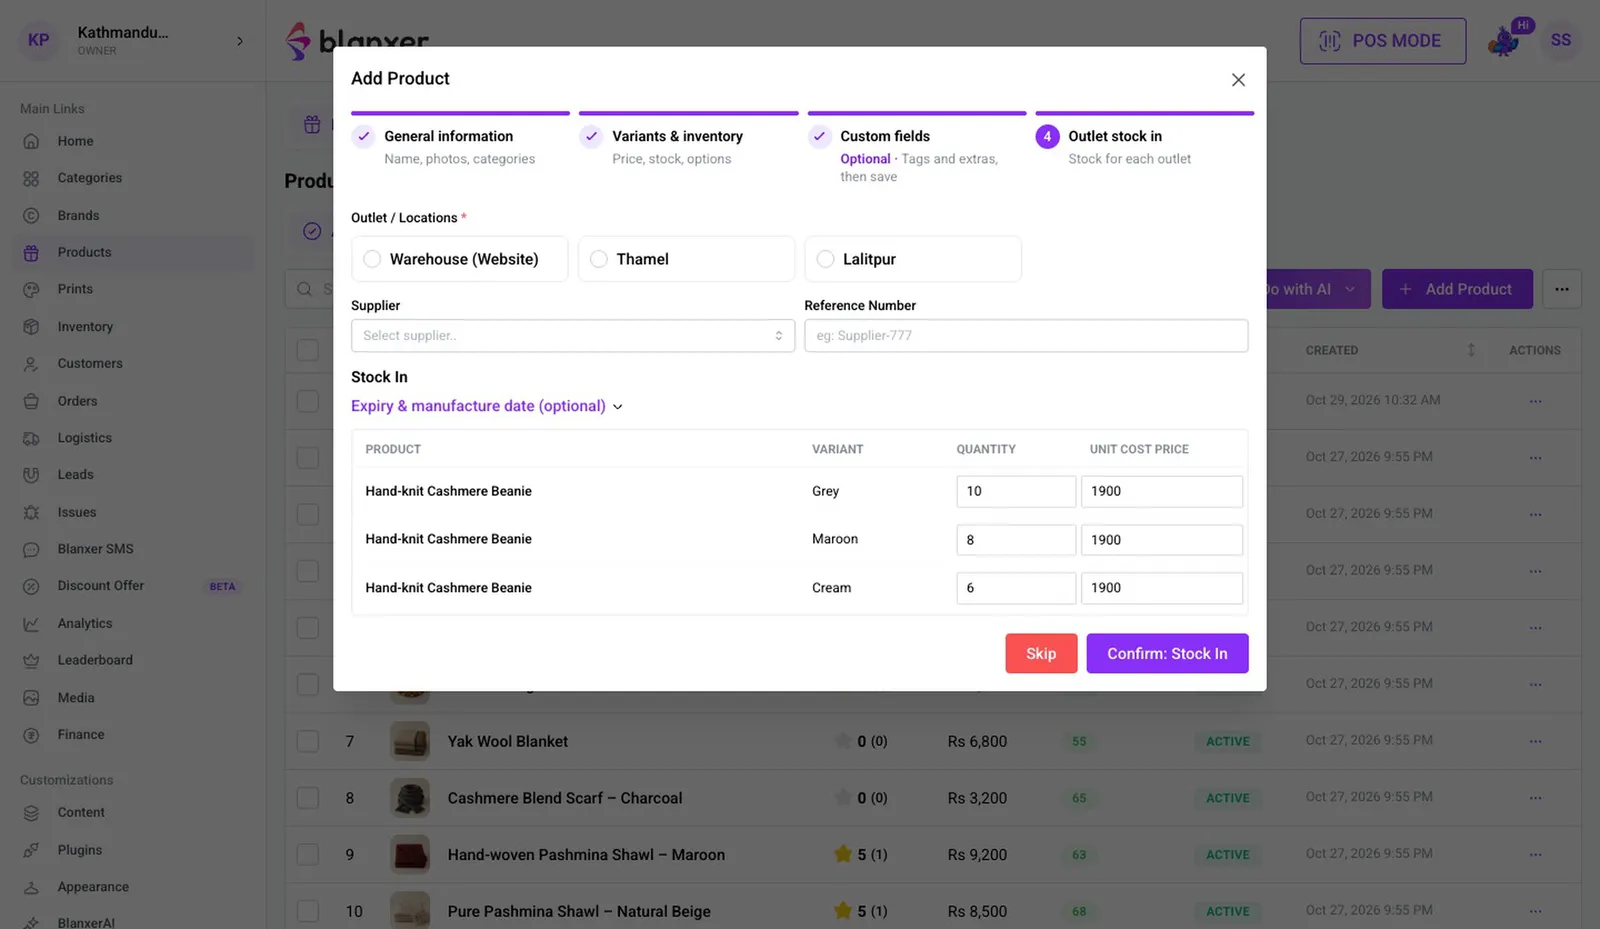
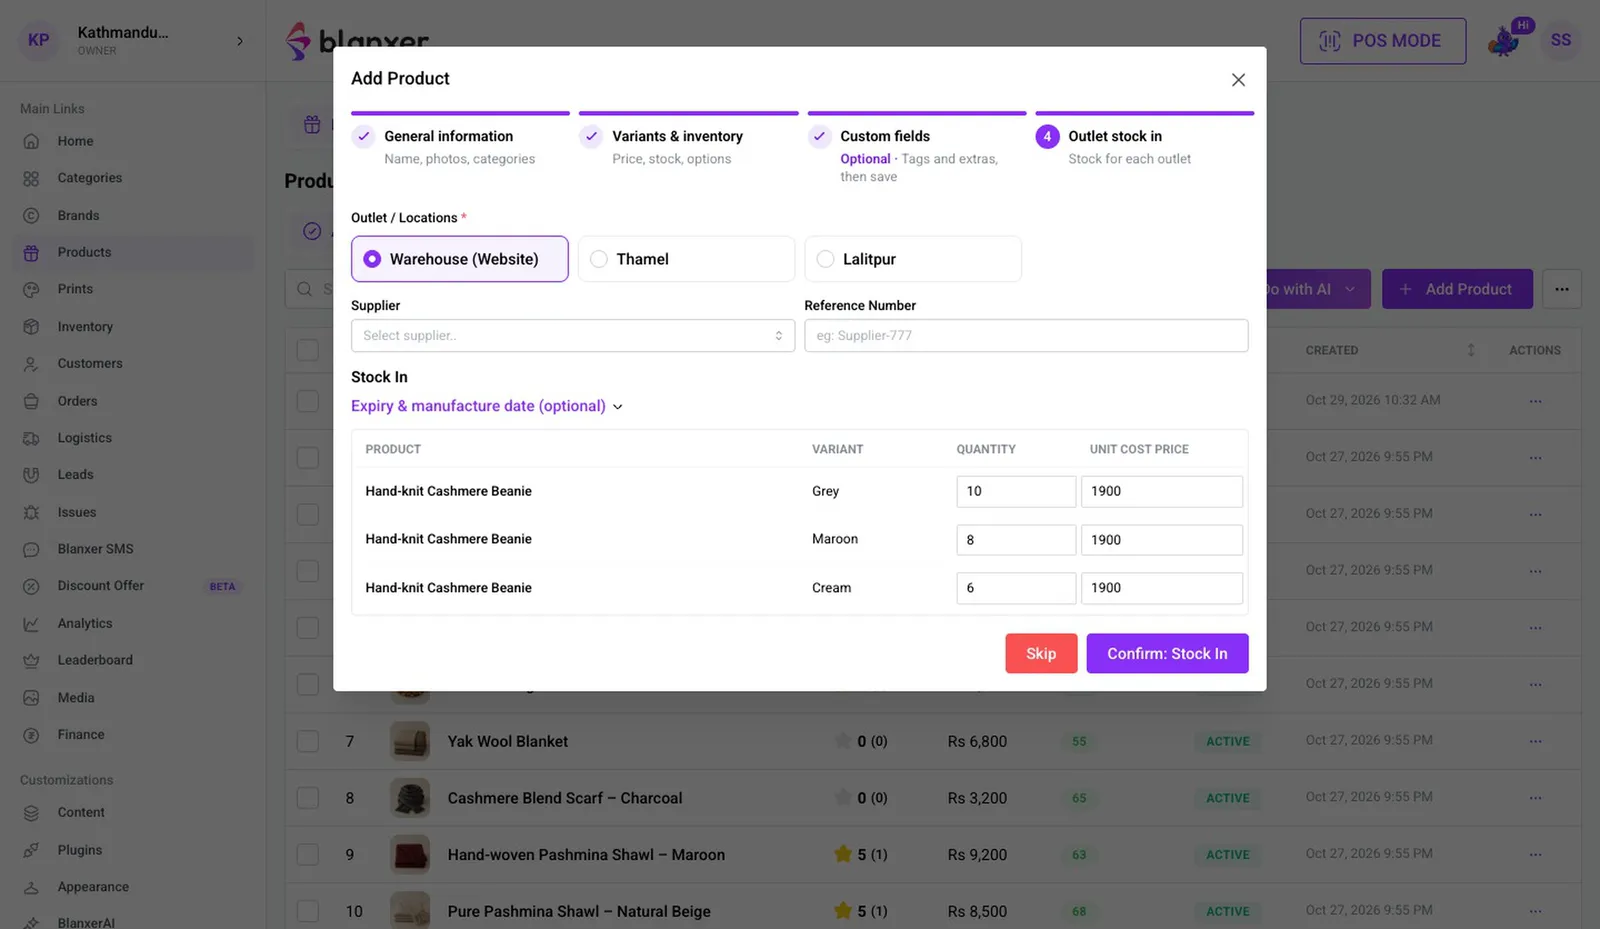
Choose the outlet
Pick the outlet the stock goes into. Website orders sell from the Warehouse outlet's stock.
- 12
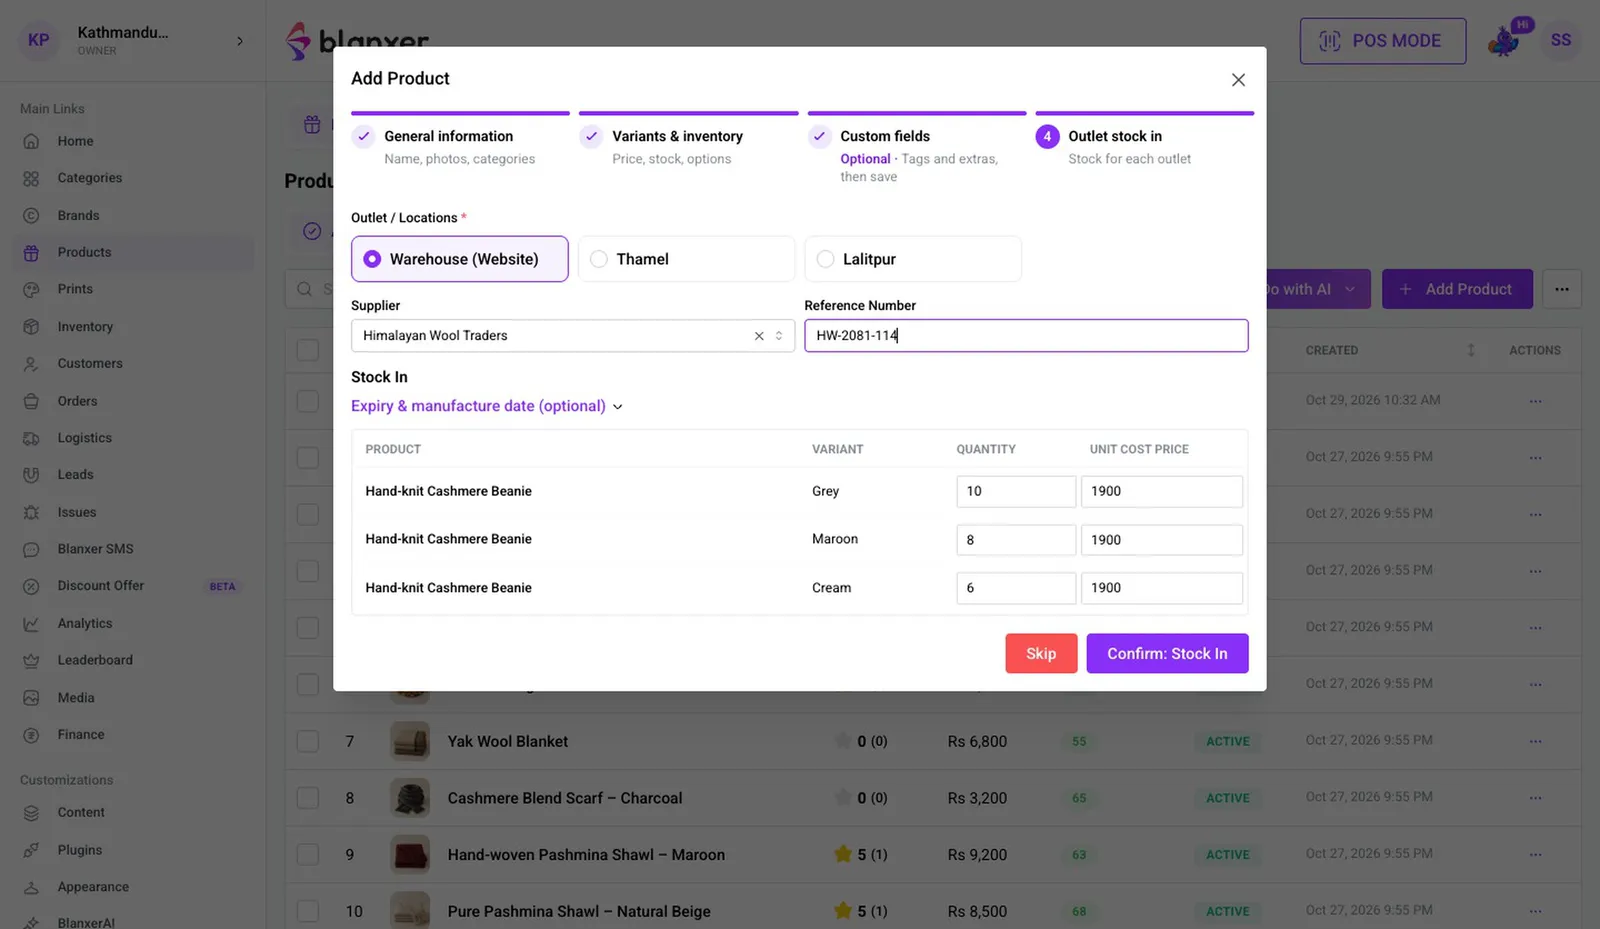
Supplier, bill, cost and expiry
Pick the Supplier and type the bill number; the purchase is added to that supplier's ledger. Quantity and cost price come over from step 2, and you can add an expiry date for goods that expire.
- 13
Stock in and print labels
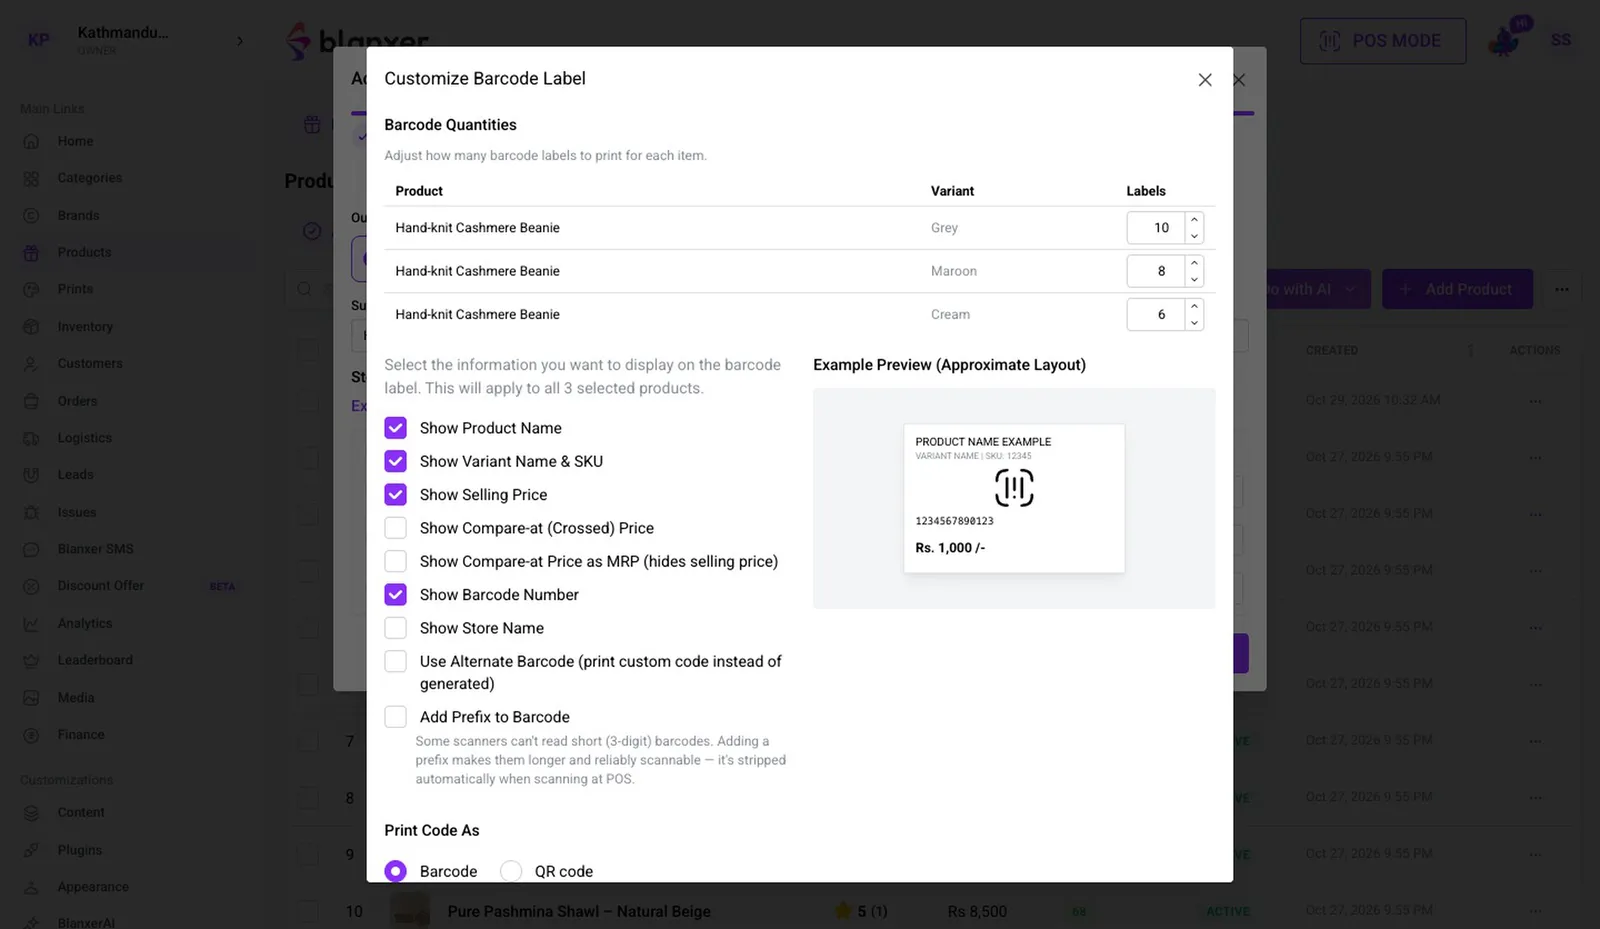
Click Confirm: Stock In and the stock reaches the outlet. Click Generate Barcodes to print exactly that many labels, with name, price and a barcode or QR.
Part 5
Google and your website
- 14
Set the SEO title and description
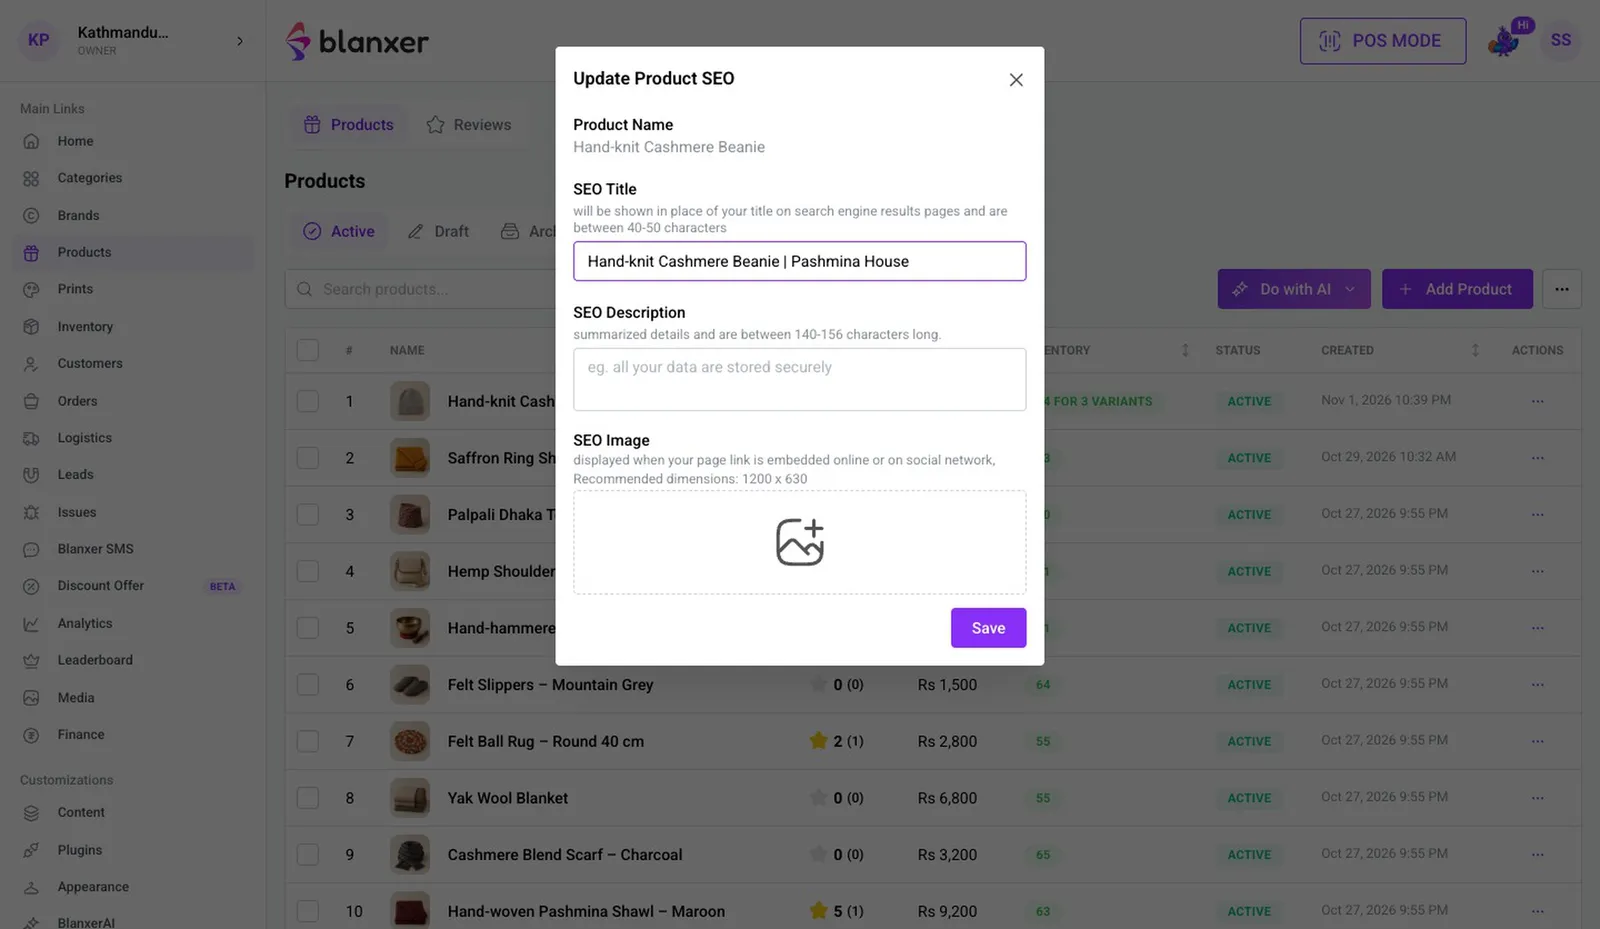
Open Update SEO Metadata and write the title and description Google shows; the length guide is under each field. The same text shows when the product is shared on social media.
- 15
Check it on your website
The product is live with its label, colours and photos. When a customer picks a colour, that colour's price and stock show.
Good to know
- This is for advanced-inventory stores. Stock is kept per outlet, and website orders draw on the Warehouse outlet's stock.
- You can change the link (slug) in Edit General Information, but avoid changing it often once the product is live.
- For many products at once, use Bulk Upload from Excel in the Products menu, alongside Bulk Edit, Excel export and catalog sync to Facebook and WhatsApp.
More videos
All 33 videos 5:43
Products
Add products (normal inventory)
Add a product with its photos, price, variants and stock, for stores on normal inventory.
 4:28
Products
Add size guides to your products
Make size charts for your clothing and link them to products, so shoppers see a Size Guide next to the sizes and pick the right one.
 6:19
Products
Set up and print barcode labels
Set up your barcode label size and what it shows, then print labels for your products to stick on and scan at the counter.
See Blanxer with your own business in mind.
Book a demo. We'll show you the store, checkout, POS and dashboard, and tell you honestly which plan you need.
Prefer to talk directly?
Already a customer? Support on WhatsApp +977 9802344850, Sun–Fri, 9 AM – 6 PM.
Follow Blanxer
 A Blanxer product
One AI inbox for every customer conversation.
Sambad.io brings WhatsApp, Instagram, Facebook, website chat and email into one inbox. Connect your Blanxer store and its AI answers from your catalogue, checks stock, quotes delivery and places the order right in the chat.
- Website chat
- Gmail
- Outlook
- Zoho Mail